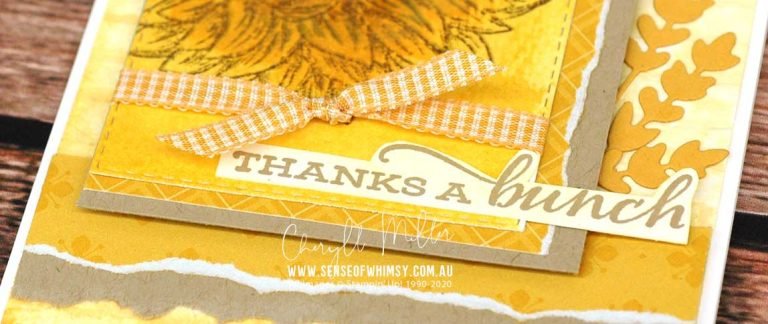
January Tutorial Bundle Design Team Blog Hop – Forever Lovely
![]()
Forever Lovely Stamp Set and Lovely Flowers Edgelits Dies

Hello and welcome to the January Tutorial Bundle Design Team blog hop!
We are a group of Stampin’ Up! demonstrators who prepare 12 tutorials each month and collate them into one fabulous tutorial bundle. Here is a little Sneak Peek of this month’s tutorials.

This month the bundle contains tutorials for:-
– great Valentine’s Projects for both male and female.
– a fabulous invitation.
– gorgeous butterflies, who doesn’t love a butterfly project.
– fabulous birthday and thank you card projects.
– step by step instructions with loads of pics.
The Tutorial Bundles are based on currently available supplies from Stampin’ Up! and have both metric and imperial (inches) measurements. So no matter where you live in the world, you can purchase the tutorial and will be able to create the projects.
AU$20.00
All currencies accepted. Paypal will do the conversion for you.

We are kicking off the release of the January Tutorial Bundle with a blog hop to showcase each of the designers. Be sure to visit everyone’s blog for a little taste of the quality and variety in this tutorial bundle.
Forever Lovely Bundle
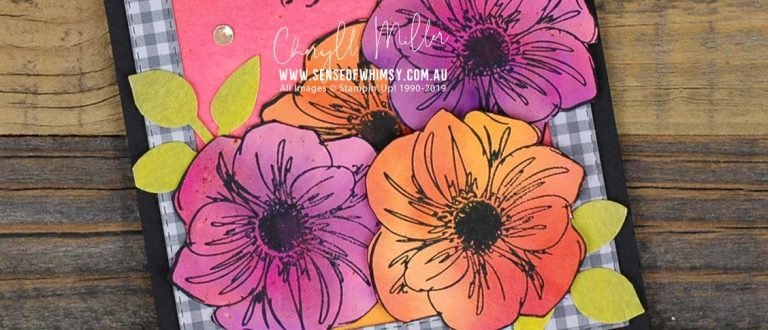
My project for the blog hop today uses the same products as my project in the tutorial bundle, however it is a totally different project. Remember my project here today is not the project in the tutorial. The projects in the Tutorial Bundle are exclusive and you won’t see them anywhere else.
Here is a sneak peek of my project in the tutorial bundle.

The Forever Lovely Bundle naturally brings soft florals to mind. However my tutorial project uses striking, monochromatic blues which pop against the white background. In contrast, my card project for the blog hop today has a totally different feel. The large expanse of black is a dramatic foil for the rainbow florals. It is great to see how you can get two totally different looks with the same stamp set.

The long floral edgelit die is used to cut the long edge of the Basic Black piece of card. It is a separate piece of card, which is adhered to the front of a Whisper White thick folded card front. I had to run the die through twice to cut the whole length. It is a bit tricky as there is the little straight bits at each end of the die. The trick is to position the end of the die off the edge of the cutting platform. I know right … it sounds totally painful, but it works and the end result is worth it.
The Stamparatus was invaluable in stamping the flowers into place on the Whisper White card front. I created an index image on poly sheet for both the outside foliage bit and the solid floral images, so that I could get the flowers to show correctly (to a degree) behind the die cut. I coloured the flowers individually with sponge daubers, and the Stamparatus also helps greatly with this process.

Before I adhered the black layer in place, I white embossed the little “Love You” greeting and then used one of the fabulous word dies from the Well Written Framelits Dies, diecut in Melon Mambo and using the Multipurpose Adhesive Sheet for ease of adhering the very fine die cut onto the card. The little hearts are also from the Well Written Framelits Die set.

I stamped the flowers to the inside of the card, and then added one of the greeting phrases from the Well Said stamp set to finish it off.

The projects in the January tutorial bundle are fresh and mostly using products from the new Occasions Catalogue or the Sale-A-Bration catalogue, so you don’t want to miss this one.
Here is the list of all the designer’s blogs, check them all out for more great examples of the Tutorial Bundle Design Team’s work.
The good news is that if you are in Australia and purchase from me using the current hostess code in my online shop, you will earn the monthly tutorial bundle absolutely FREE.

If you are part of my Inks and Whimsy team, you will be receiving the tutorial bundle for FREE.
Click here if you would like more information about being part of my team, or email me at cheryll@senseofwhimsy.com.au to get some more information. Great products at a discount, a fantastic online crafting community to help you get the most out of your supplies with my team and never, ever any pressure. Why wouldn’t you?!
![]()
Check out all the tutorials on my Online Class and Tutorial page.
xx
Cheryll
If you are in Australia, the products used to create this project can be purchased in my online shop. I very much appreciate your support.
Product List
|
|
|
|
|
|
|
|
|
|
||
|
|
|
|
|
|
|
|