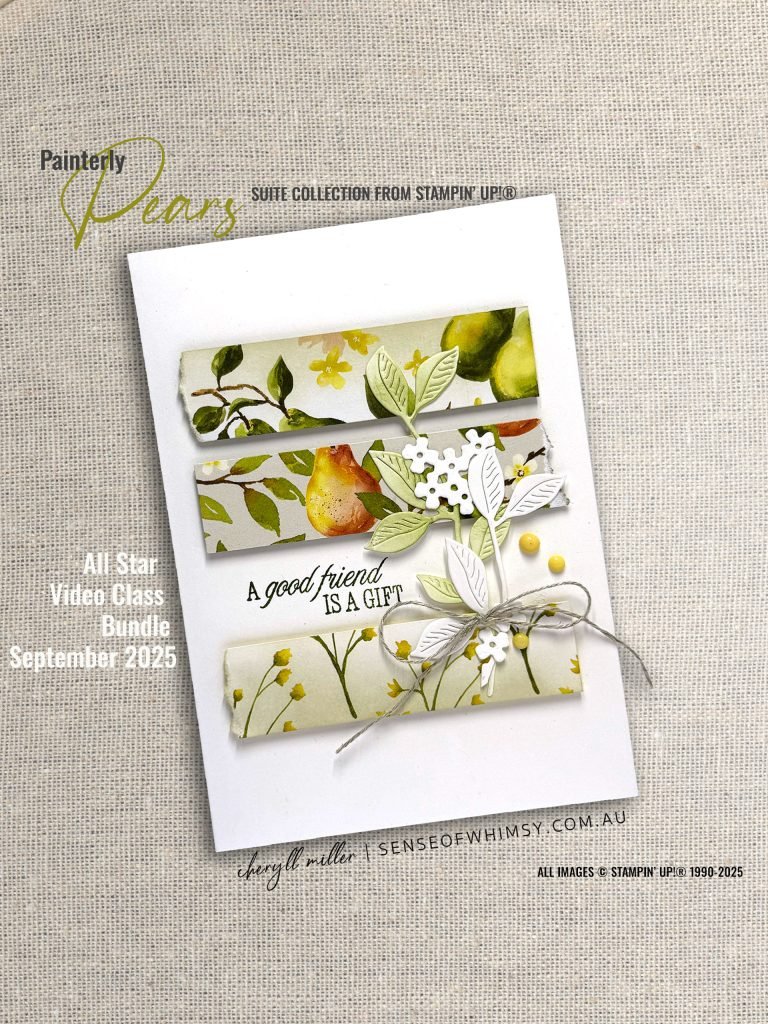
Watercolouring with Stamps Technique for Colour Inkspiration Challenge 172
![]()
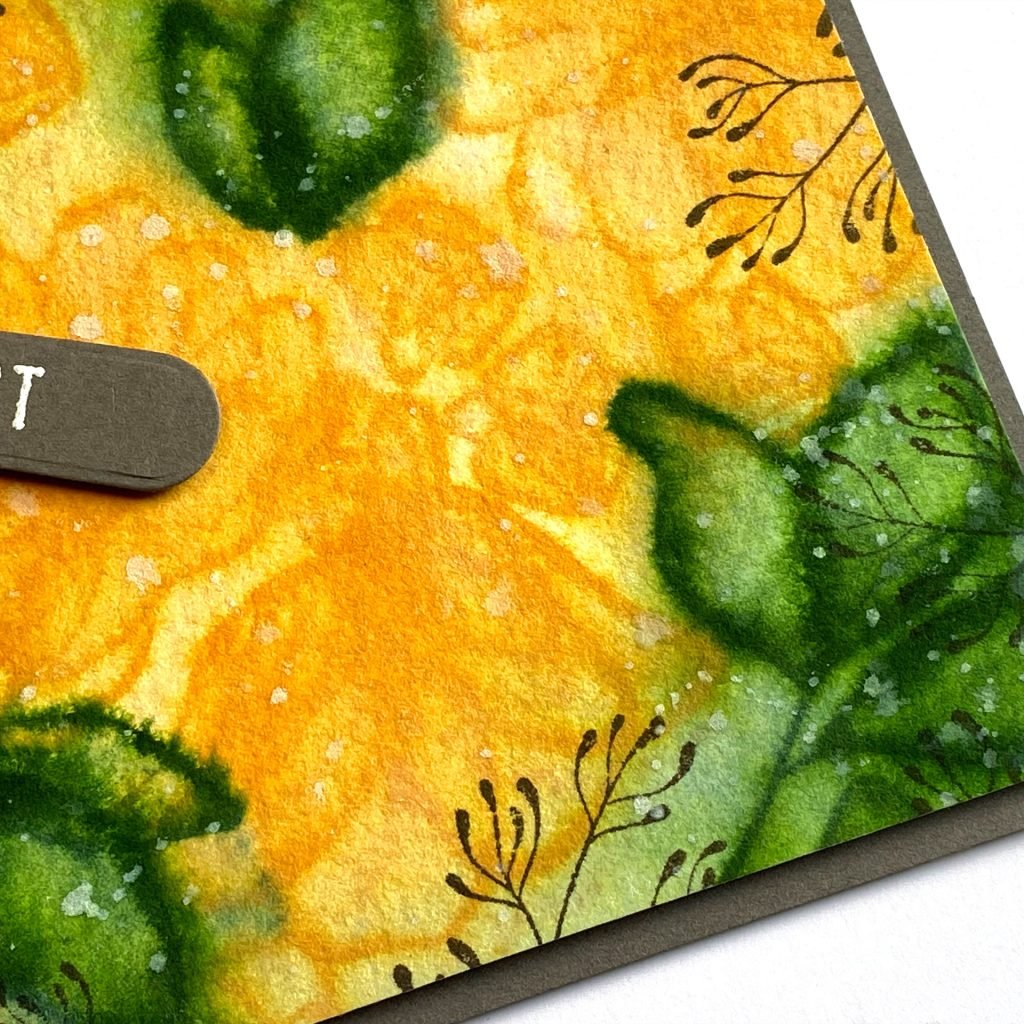
Watercolouring with Stamps Technique and the Translucent Florals stamp set have been used to create this project for Colour INKspiration Challenge 172. I so enjoyed creating this one, using the technique as a starting point and then tweaking it to get finally rest at this “enough now Cheryll” result.


Welcome to our 172nd challenge at Colour INKspiration. Our inspiration image for this challenge was chosen by Colour INKspiration Crew Member Monica Formosa.
CI#172 will run for almost TWO weeks and will end at 7 pm (AEST/AEDT) on Monday 9 September, 2024.
For more details on how to participate in this fun colour challenge, scroll down to the bottom of the page.
Photo Credit: https://colorbyk.com/trastevere-rome-neighborhood-review/
Watercolouring with Stamps …
I am not sure what sort of crafter you are, but I am definitely one who just loves to get lost in creating in my happy crafting space. This was one of those projects. The “watercolouring with stamps” technique can be achieved in a number of different ways, but it involves inking up your stamp (with either inks or water based markers) and then adding water to the mix. You can either spritze the ink on the stamp itself before stamping, or you can add the water to your watercolour paper before placing the inked stamp down onto the wet surface. You will get a different effect every single time depending on what method you use and how much water is involved. I did video my creative process and will pop this up on Youtube shortly.
MATERIALS
Line Art Stamps (flowers and leaves work well) / Small foliage dies / Watercolour Card Stock / Dye Inks x 3 shades / Water Spritzer / Water Brush & extra water / Patterned Paper & co-ordinating cardstock / White Ink Refill / Small sentiment stamp and White embossing powder / Twine
*For a full list of supplies I used, click on the first image or scroll on down to the bottom of this blog post.*

instruction
Step 1 / Grab a panel of Fluid 100 Watercolour card stock the same size as your folded card front. I trim this down after it’s coloured and dried to fit onto my card front leaving a slight border. Spritz the Watercolour card liberally with water, ink up the first stamp (I did the corner leaves first) with Garden Green ink and stamp into the water on the card. If you have enough water, the image will immediately start to bleed and look almost unrecognisable. That is what it is supposed to do! Continue on stamping more leaves and the floral images in Peach Pie ink, spritzing more water onto the watercolour card if you need to. You should end up with a water colour wash look with your colours in distinct areas. Dry with a heat tool.
Step 2 / Once dry, re-stamp your images again, roughly in the place where you stamped before (no spritzing this time). The next steps are optional, depending on what your panel looks like. I wanted mine to look a little more “watercoloury”, so I spritzed my images lightly so the outlines started to bleed. I also splattered the piece with water and a paintbrush and then picked up the water to draw the colour out of the piece by laying a piece of watercolour paper over the top. I also added some additional colour to my flowers by adding some Peach Pie ink using and water brush to the centre of the petals. Dry with a heat tool.
Step 3 / To add some light and movement to the piece, I mixed some White Craft Ink Refill with water on an acrylic block (or use your glass mat) and then tapped the paintbrush with my finger to get a white splatter. Dry with a heat tool.
Step 4 / I cut the piece down to fit my card front, and then sliced off approx 2cm (3/4″) off one end (this will be for the insert). On both pieces, I created a “frame” by stamping the fine line sprig image with Pebbled Path around the edges. Immediately, I just went “Aaaaah, that is what it needed”. But you may not need to add this step depending on what your original watercoloured piece looks like.
Step 5 / I adhered the watercolour panel and a strip of Designer Series Paper in a Garden Green colourway (this is from Nest of Winter DSP, available from 4th September) to a Pebbled Path panel. The pieces fit exactly onto the panel … because I want to pop both those layers up with dimensionals, it is just easier to adhere them to a panel the same size as the overall layer first.
Step 6 / I added some of the Pebbled Path Jute Twine wrapped around the piece to cover the join and tied in a knot. But before I did that I white heat embossed the sentiment onto Pebbled Path card and die cut with a tag die from the Unbounded Love die set (but you could easily cut a tag shape on your trimmer. Then I threaded the tag onto the Jute Twine before tying the knot.
Step 7 / I added some die cut leaves and twigs in Garden Green and Pebbled Path behind the tag, adhere that left over strip of watercoloured card to the inside and I was (finally) done and happy.
Video
I created a video for you of the creation process, including all the “oh no” moments.


INKspired to join the challenge?
Why don’t you join in the challenge with us? Create a card for the challenge using all three colours. You may also add Very Vanilla, Basic Beige, Crumb Cake and metallics to your project. We also allow ‘Ivory’, ‘Bronze’, and ‘Natural Tones’ in the Stampin’ Blends. If you don’t have the colours in our palette, feel free to use the closest Stampin’ Up! substitute – Basic Gray instead of Pebbled Path for example. Then upload it to the Facebook group here.
We can’t wait to see what you create! This challenge finishes at 7:00pm on Monday September 9th.
To check out all the challenge parameters, go to the challenge post first here.
To get your creative ideas flowing, make sure you check out the Crew’s Projects in the CI#171 Album here.
Not a member of the Colour INKspiration Facebook group yet? Just click here and ask to join Colour INKspiration (don’t forget to answer the questions). Then add the group to your favourites and share it with your crafty friends so they can join in the fun too.
xx Cheryll
SHOPPING INFORMATION
If you are in Australia and would like to purchase any of the supplies to create this card, links to my online store and shopping info are listed below. All purchases over $50 will receive a Video Class Bundle (12 videos to watch at your leisure) and go on the Catalogue mail out list for the next Mini Catalogue coming out in September.
In the case of the Translucent Florals Bundle, I have used only the stamps from this bundle, but when you purchase both the stamp set and dies together, they are bundled at 10% off both, so well worth looking at the bundle option … I have listed the bundle separately.
Similarly with the Changing Leaves Bundle, I used the dies only (which come with the embossing folder), but this amazing Online Only bundle is becoming one of my favourites, and it is well worth getting the Stamps/Dies and Embossing Folder as a bundle for 10% discount off all three … I have listed the bundle separately. In fact, you could use the leaf stamps for the watercolour with stamps technique if you didn’t want the florals.
")
") |
 |  |  | ||
 |  |  |  |  |
 |  |  |
")