Favourite Sale-A-Bration Product for Stamping Sunday Blog Hop
![]()

Happy Birthday To You Sale-A-Bration Stamp Set …
Welcome to my blog on this second
Today I am
Sale-A-Bration Happy Birthday To You …
Check it out … this exuberant cake just screams “celebrate” and indeed that is one of the sentiments in the set. And the good news is that as of 1st February, you will be able to purchase dies to cut out the cake, flowers and other elements in this stamp set. Yaaay!

Only available with an AU$90 purchase of Stampin’ Up! product during Sale-A-Bration (3 Jan to 31 Mar 2020)
Co-ordinating Dies will be available to purchase from 4th February 2020
Beginner, Casual and Avid Crafters
For this hop, I am doing the “Beginner, Casual and Avid” samples. If you are familiar with Stampin’ Up! you will have seen these terms used quite a bit this year.
A beginner crafter is someone who is new to stamping, and will be looking to create with just inks, stamps and paper.
A casual crafter is someone who thinks that this papercrafting lark is pretty good and is keen to move beyond the basic supplies, maybe get a punch or two … or even invest in a diecutting machine.
An avid crafter is feeling the passion, knows that getting into the craft room is an inexpensive form of therapy, and is accumulating lots of “things”. Of course, she wants to use them all and doesn’t blink an eye at taking an hour to make a card! 😉

Which type of crafter are you?
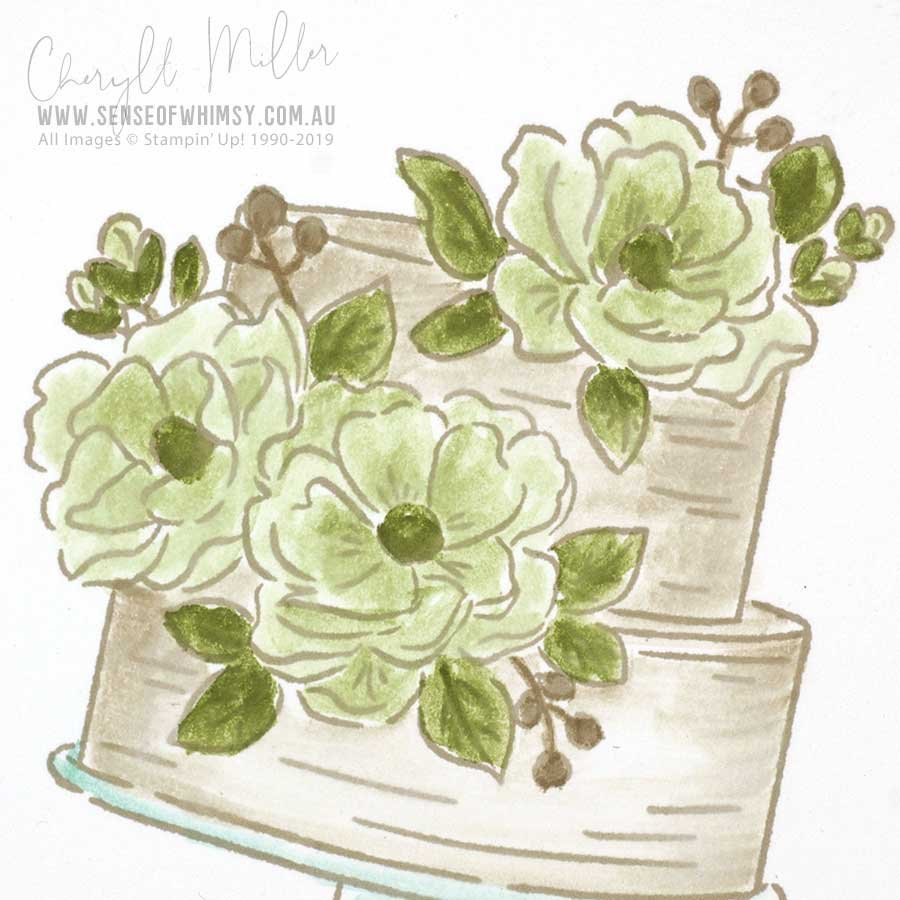
Beginner Project
My beginner project is very simple and uses basic supplies. It is truly Simple Stamping using Stamps, Inks and Cardstock …. with colouring using inks and Blender Pen.

Directions Beginner Card …
- Stamp the cake and Happy Birthday sentiment onto the Whisper White Folded card using Crumb Cake ink.
- Colour the cake with a Blender Pen and Crumb Cake, Pool Party, Pear Pizzazz and Old Olive inks.
- Add shading around the base of the cake stand with Blender Pen and Pool Party inks.
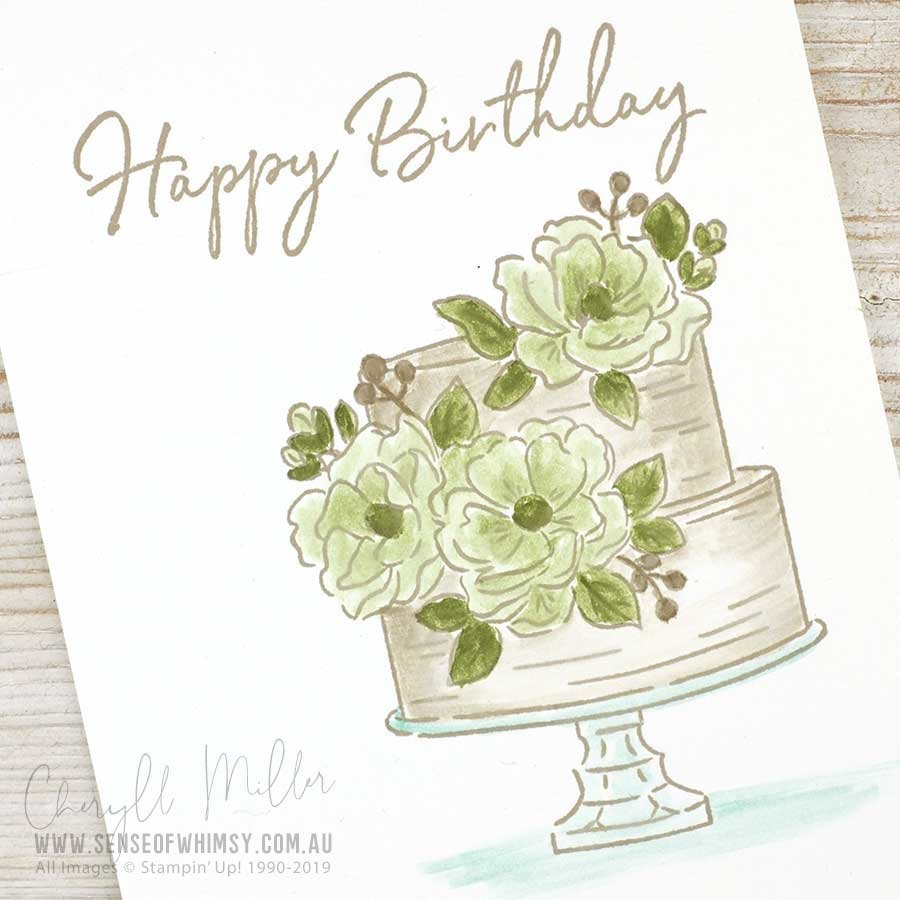
This card uses minimal products:- Happy Birthday to You Cling Stamp set (free Sale-A-Bration item), four inks (Crumb Cake, Pool Party, Pear Pizzazz and Old Olive), one cardstock (Whisper White Thick), Blender Pen. And amazingly (for me) …. no adhesives!!!
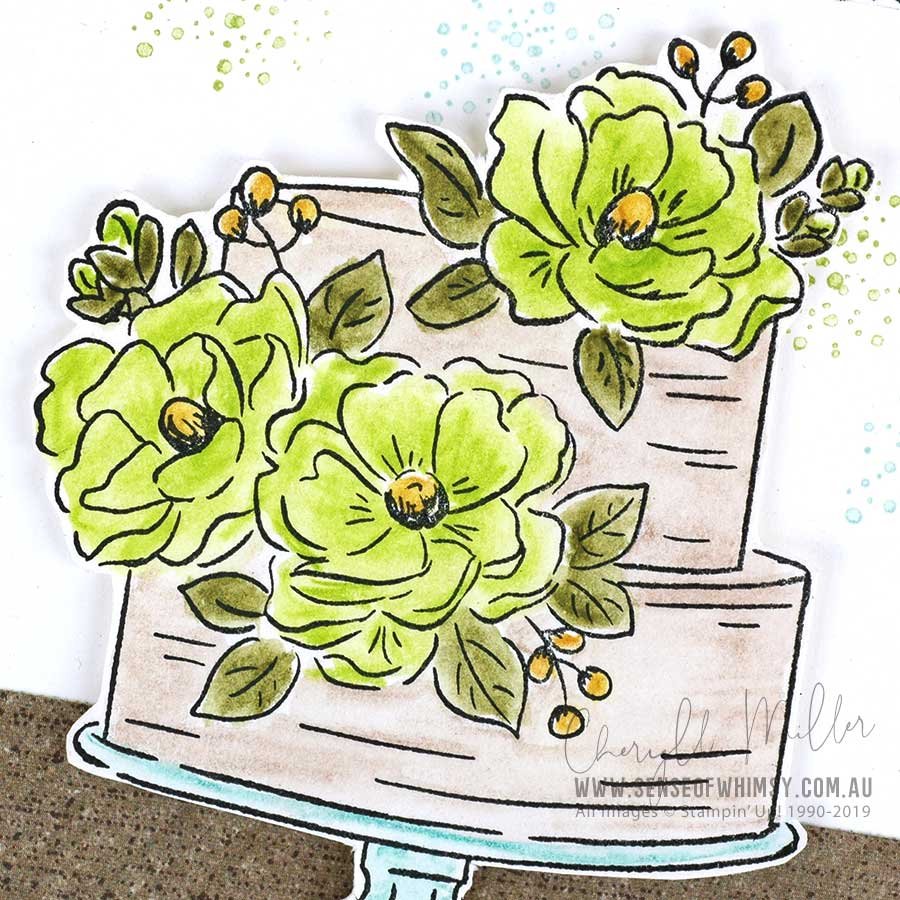
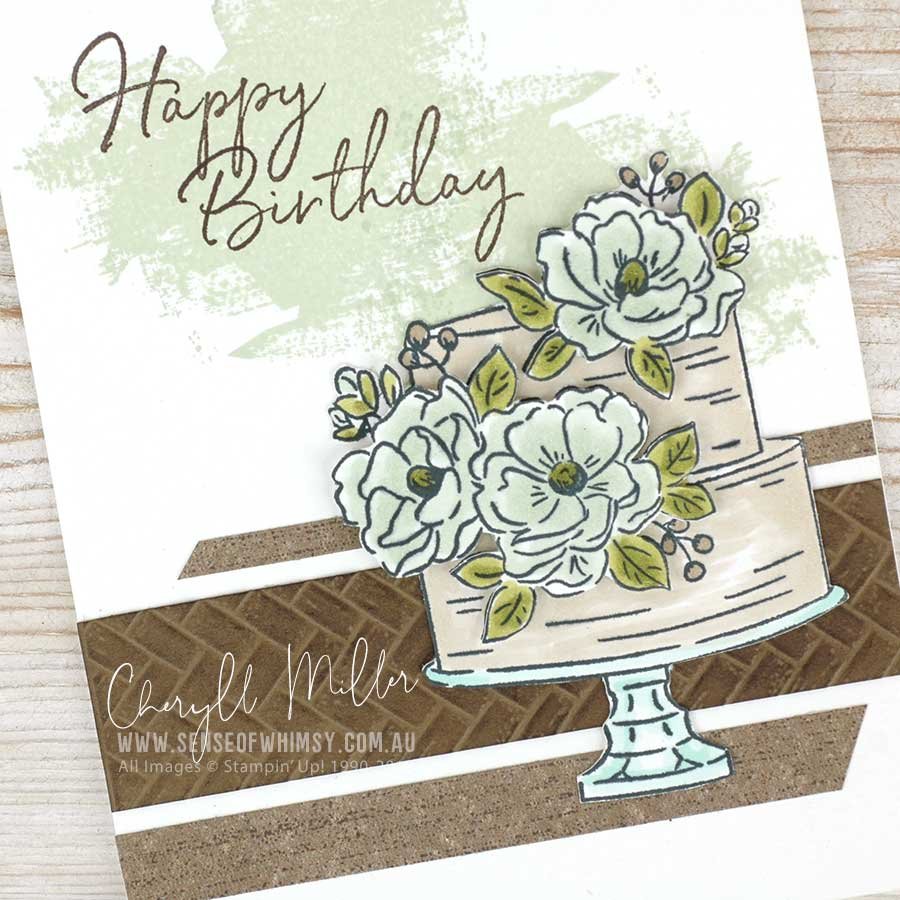
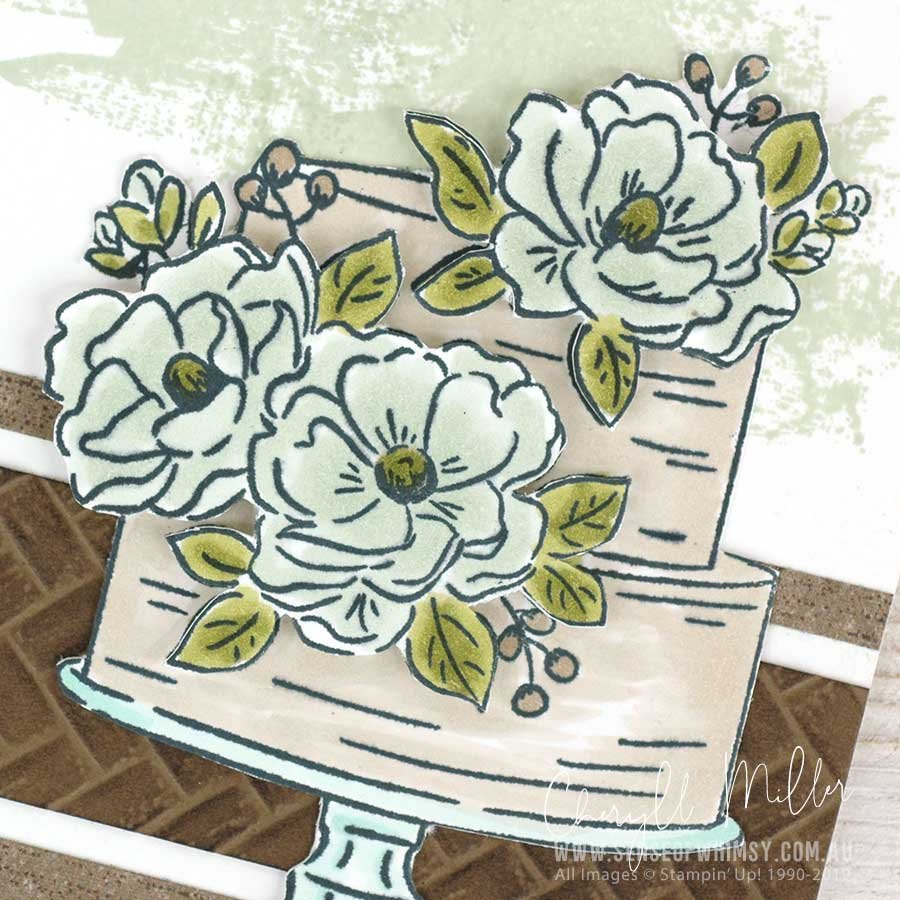
Casual Project
The Casual project adds just a few additional supplies, a little fussy cutting and a different colouring method. For this project, I have coloured the cake with Water Colour Pencils and an Aqua Painter.

Directions Casual Card …
- Stamp Happy Birthday using Stamparatus and Tuxedo Black Memento Ink onto Whisper White folded card,
- Stamp the dot image onto card front with Pool Party and Peark Pizzazz inks, stamping off to get a lighter image.
- Adhere a strip of Tropical Oasis Designer Series Paper onto cardfront.
- Stamp the cake image onto Shimmery White Cardstock with Stazon Jet Black Ink. Colour with Watercolour Pencils (Granny Apply Green, Early Espresso, Coastal Cabana and Old Olive) and and Aqua Painter.
- Fussy cut the coloured cake and adhere to card front with Stampin’ Dimensionals.
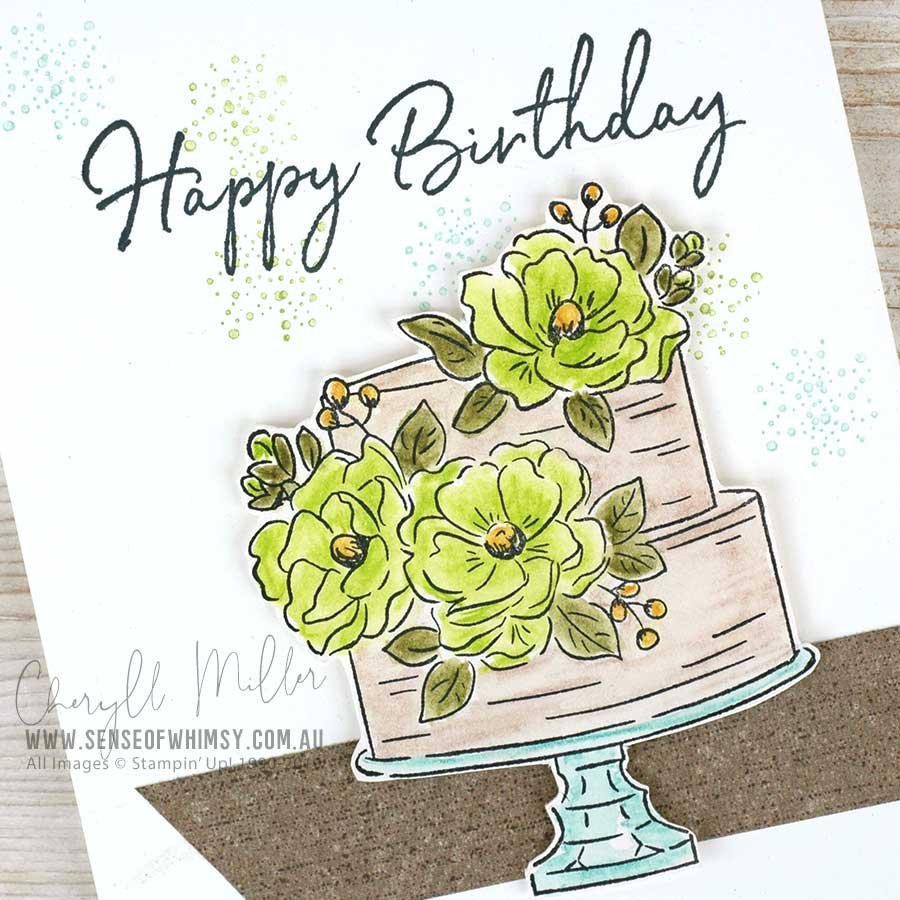
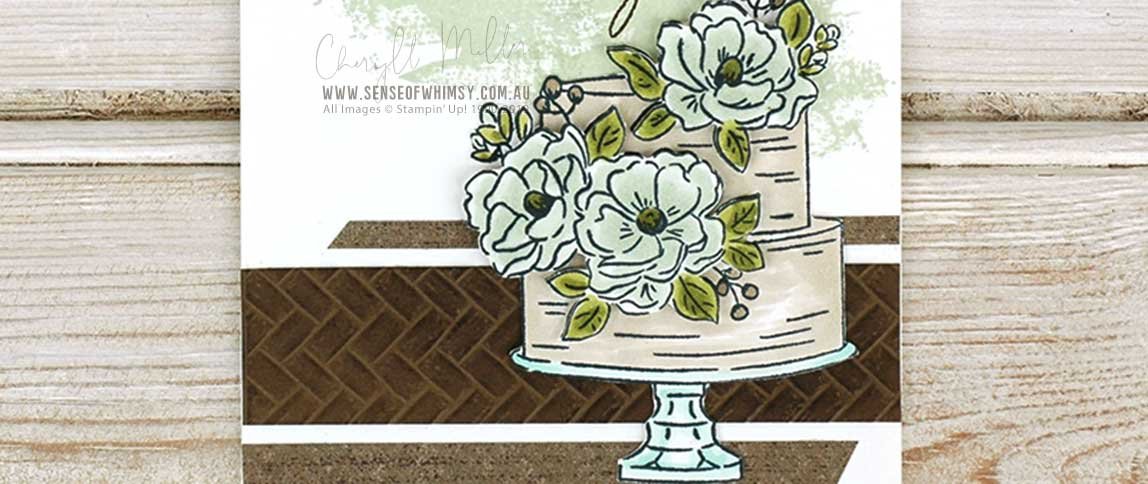
Avid Project
My project for the over the top Avid Stamper takes just a little more time, and requires some serious sponging!

Directions Avid Card …
- Stamp texture image from Artisan Textures Stamp Set twice using Soft Sea Foam ink onto the front of folded Whisper White Thick cardstock.
- Stamp the “Birthday” part of sentiment with Early Espresso Ink over the texture image on card front (mask “happy” with washi tape before inking … don’t forget to remove the tape before stamping). Repeat process to stamp “Happy” onto card front.
- Emboss a strip of Soft Suede cardstock with Coastal Weave 3D Embossing Folder. Sponge Early Espresso ink over the piece to highlight the texture.
- Adhere the embossed strip to card front. Adhere two strips of Tropical Oasis Designer Series Paper to card front.
- Stamp the cake twice onto Whisper White Thick cardstock with Black Memento ink.
- Colour onevcake image with Stampin’ Blends – Soft Seafoam Light and Dark, Old Olive Light and Dark, Crumb Cake Light and Dark, Pool Party Light and dark. Colour the flowers only on the second cake image.
- Fussy Cut one cake image in full and the flowers only out of the second cake image.
- Adhere the flowers onto cake with Stampin’ Dimensionals. Adhere piece onto card front with Multipurpose Liquid Glue.
I am really looking forward to seeing what the rest of the design team members Sale-A-Bration favourites are. Here is the full list of hop participants … visit them all and be inspired.
xx
Cheryll
Oh my goodness do I love your choice of colour here … and I adore your avid card. B E A utiful !! xx
Thank you Mikaela! xxx
Your cards are amazing Cheryll, love the colors you used.
Thanks so much Janneke! xx
These are lovely projects and so good to see, what you can do with a card, when you change little things. Thanks for sharing.
Thanks so much Cornelia! xxx
This set of cards is fabulous! I really like the colour combination. The way that the ‘story’ of the cards unfolds as you read down the page and see each incarnation is great! And each project is a lovely creation all on its own.
Hello Jan … and thanks so much! These were fun to create, so many ways to colour this lovely floral cake image. xx Cheryll
Beautiful projects Cheryll! I adore that stamp set too. Love all the different coloring methods you’ve demonstrated! xxx
Thanks so much Tami. Your projects are AMAZING!! So inspirational. xxx
Cheryll, you never cease to amaze me with all the little details you work in! Every one of these cards is beautiful in their own right.
Oh thank you Sara! Great hop and so many stunning projects this month. xx