
Stamping Sunday Blog Hop – All Tied Up
![]()

Parcels and Petals …
Welcome to my blog on this second
Today I am
Parcels and Petals
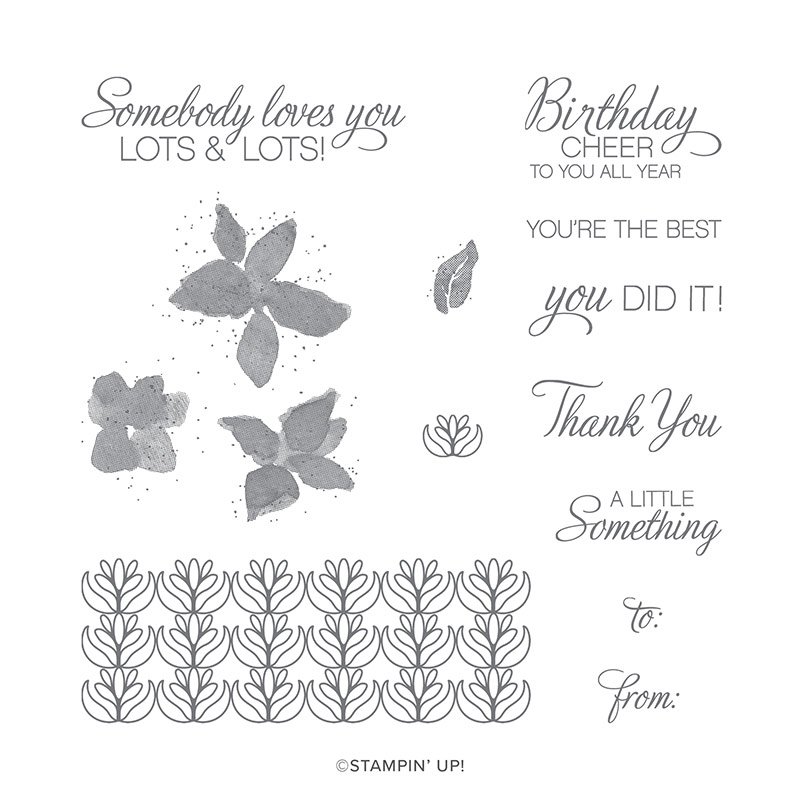
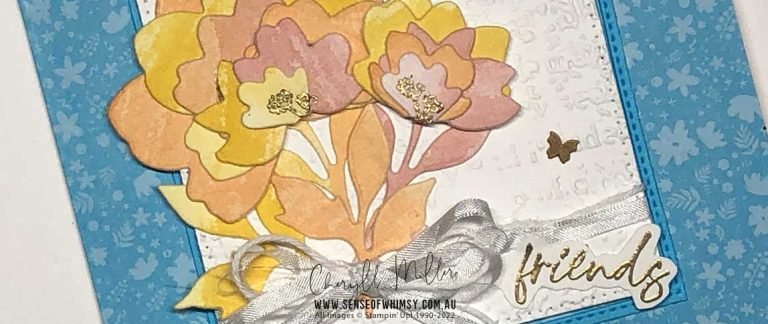
Today I am using the Parcels and Petals Cling Stamp Set, which features these lovely random looking flowers. That’s very me, so random!
Beginner and Cavid Crafters
Okay, so for these hops, I usually feature cards suited to Beginner, Casual and Avid Crafters …. I will tell you that I have been creating my cards today, right up until the alarm sounded to let me know “one hour before your post goes live”. I have been having a wonderful Sunday creating various projects for the week and realised that I still didn’t have my ribbon cards done. Eeeeek!
And there was probably a subconscious reason for this. I love ribbon, but I don’t use it very often. Twine and Linen Thread … yep, use those until the cows come home. But ribbon …. nah, not so much. I mean … ribbon is for tying bows, for making things “pretty”.
Anyway …. with just an hour to create and an hour to blog, I figured I had better start at the Beginner end of the scale.

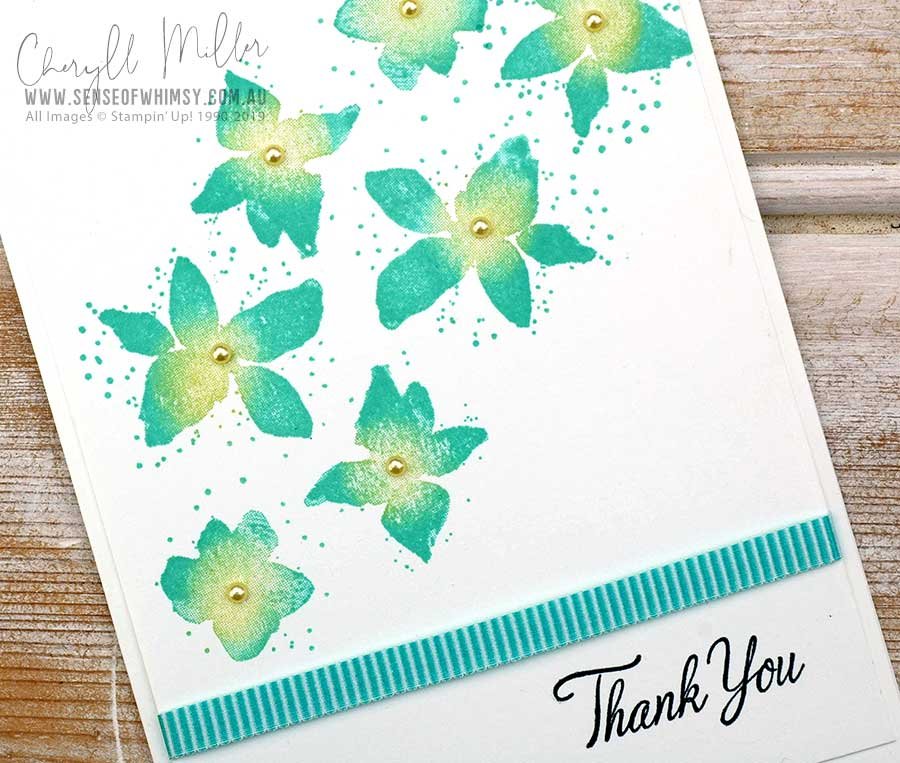
This is a simple card with a little twist. I believe that any level of stamper can up the ante of their cards without too much extra work, and one of the ways to do this is to add ribbon. The most simple way to add ribbon is to wrap a single length around a card and adhere at the back. No fussy tying of bows, just a tactile strip of colour.
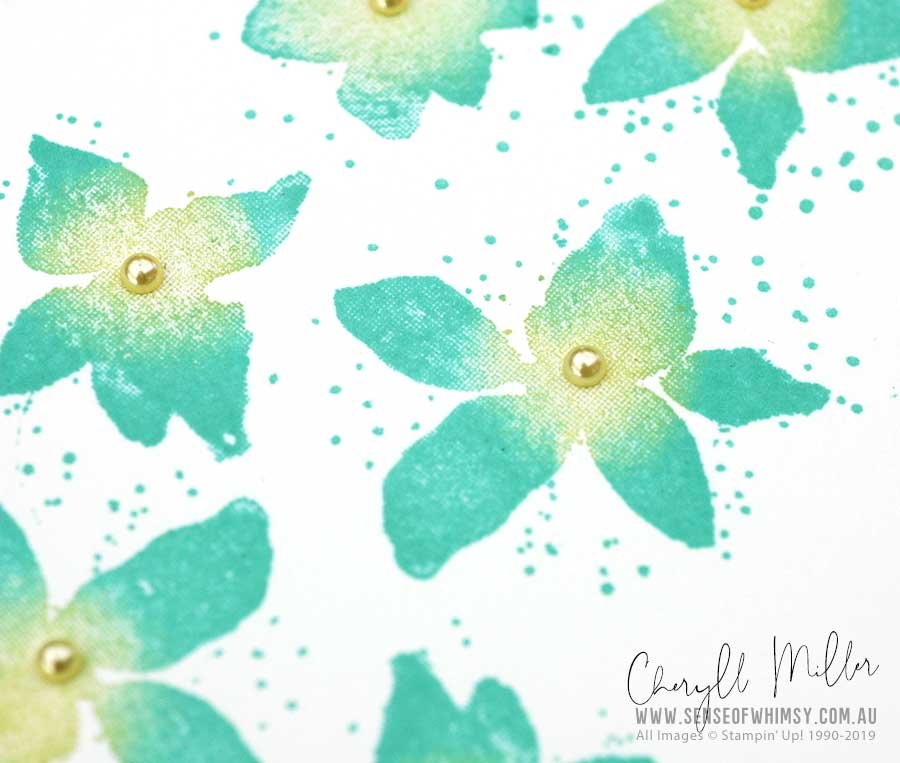
My flowers have been stamped on the stamparatus …. “colouring with the stamparatus”, I call it. Sponging colour onto selected areas of the stamp with a sponge dauber. You can add many layers of colour to add depth and intensity. Even the most beginner stamper can do this, and it is why I encourage all beginner stampers to get a Stamparatus as soon as they are at a point when they would like to make cards on a regular basis.
Those little Gold Metallic adhesive elements are another way to step up a simple card.
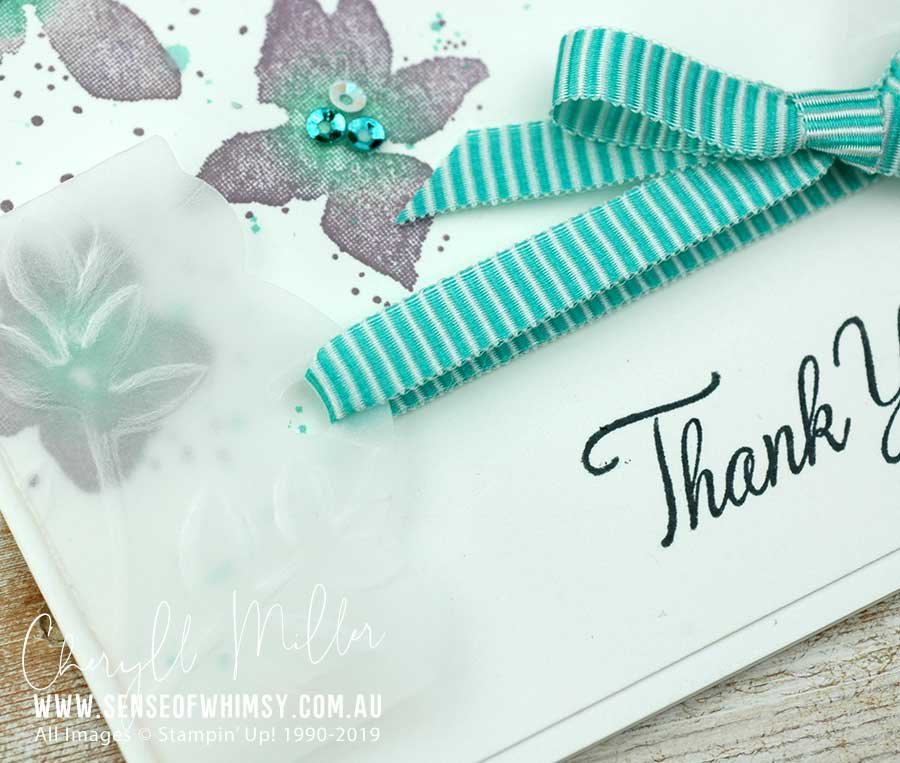
Next up is the project for the Casual Crafter, except somewhere along the line, I took it a little bit further than “casual” and into the realms of “avid” …

Oh dear … so many things went wrong with this card! But I pushed through and kept doing “stuff” and in the end, I am happy with the result.
I used the Perfect Parcel dies on this card. They come bundled with the stamp set for a 10% discount. One of the dies is a tag top die which cuts this curved tag top shape with a hole in the top. I used this die to cut two tag shapes out of Vellum and embossed them with the Layered Leaves 3D embossing folder. Folded around and attached to the back of the stamped layer, I could tie them together with a length of Bermuda Bay Mini Striped Ribbon.
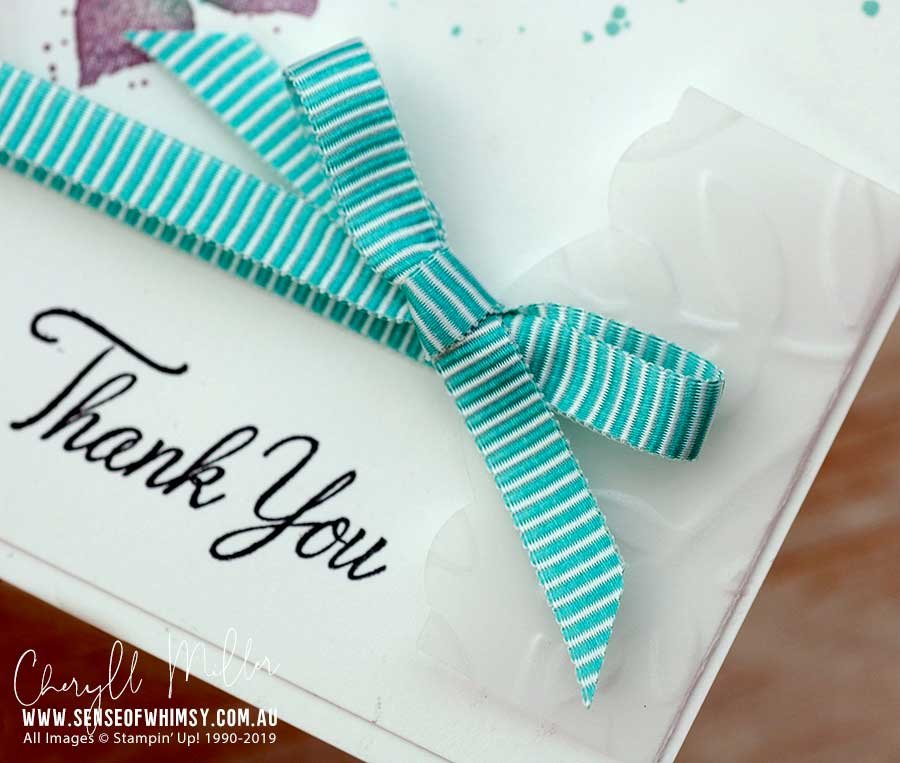
So at this stage, the card should have been finished, but I thought it looked a little bland. I decided to “splatter” the flowers with Coastal Cabana ink to add a little spark. It was a comical sight to see me covering over the already assembled bits of the card to be able to splatter without it getting everywhere it shouldn’t. Mostly it worked!!
Then I wanted to add some more bling and my new favourite bling is the Woven Threads Sequin Assortment. Instead of just flinging a few around the place, I decided to group three of the itty bitty sequins in the centre of each flower. Oh My!!! This is not something I would do on a facebook like, that’s for sure. I used a dab of Multipurpose Liquid Glue and placed three sequins in each little dab of glue. I think I gummed up every possible tool doing this, my Take Your Pick Tool, my tweezers, my Paper Piecer ….. it took ages, but it looks good!!!

And then, because I spent so much time mucking around with my Casual card, I ran out of time to create an avid card. But in reality I took my casual card into avid territory, so it became a “Cavid Card”.
I am really looking forward to seeing what the rest of the design team members come up with using the great ribbons Stampin’ Up! offer. I am sure they will be far more inspiring than my efforts! Here is the full list of hop participants … visit them all and be inspired.
The Stamping Sunday teams create a tutorial bundle each month. This month the tutorial projects feature projects and techniques using Stampin’ Up!® Stampin’ Blends. All projects use current Stampin’ Up! products. Five fantastic, detailed tutorials with step by step pictorial instructions. Here is a sneak peek of the tutorial projects.
The Tutorial Bundles are based on currently available supplies from Stampin’ Up! and have both metric and imperial (inches) measurements. So no matter where you live in the world, you can purchase the tutorial and will be able to create the projects.

Stamping Sunday Tutorial Bundle – August 2019
AU$12.00
All currencies accepted. Paypal will do the conversion for you.
If you are making a purchase from me during August, you will receive the Stamping Sunday Tutorial Bundle for free. And if you are an Inks and Whimsy team member, you will also receive this tutorial bundle for free each month.
Check out all the tutorials on my Online Class and Tutorial page.
xx
Cheryll
Supplies for the Beginner Card:
Product List


 Mini Striped Ribbon")
Supplies for the Cavid Card:
Product List


Great card Cheryll Love the colour.
Thanks so much Dianne! xxx
Oooh I love the multicolored stamping on these flowers, they are the perfect image for this technique. Haha love the concept of a Cavid card, bit more that casual but not quite Avid
Thanks so much Tanya! Great to hop with you! xx
Cheryll, I loved reading about your crafting experience. Had you not said something, I never would have guessed you created these last minute, because they are gorgeous!!! I especially love the sponged, multi-colored flowers and all those beautiful sequins! Amazing!
Oh thanks so much Tami! I am one of your number one fans, so I am super thrilled that you read through my wordy post! 🙂 xxx
Your cards are beautiful with their variegated flowers! Love those tiny sequins in the middle…and just enough ribbon.
Thanks Sara! xxx
Not only do I love your choice of ribbon, but I love your Stamping too and the colours you have chosen here. The variation in colours is just beautiful. Great work xx
Thanks so much Mikaela. xxx