
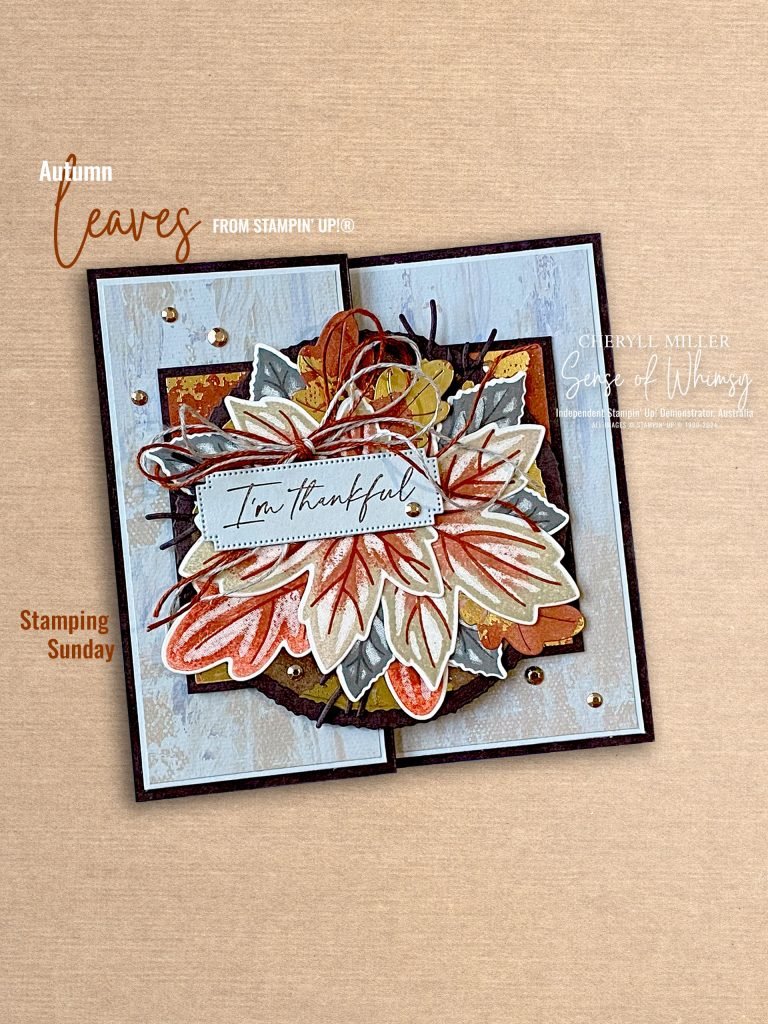
Standing Pop Up Card – Stamping Sunday
![]()
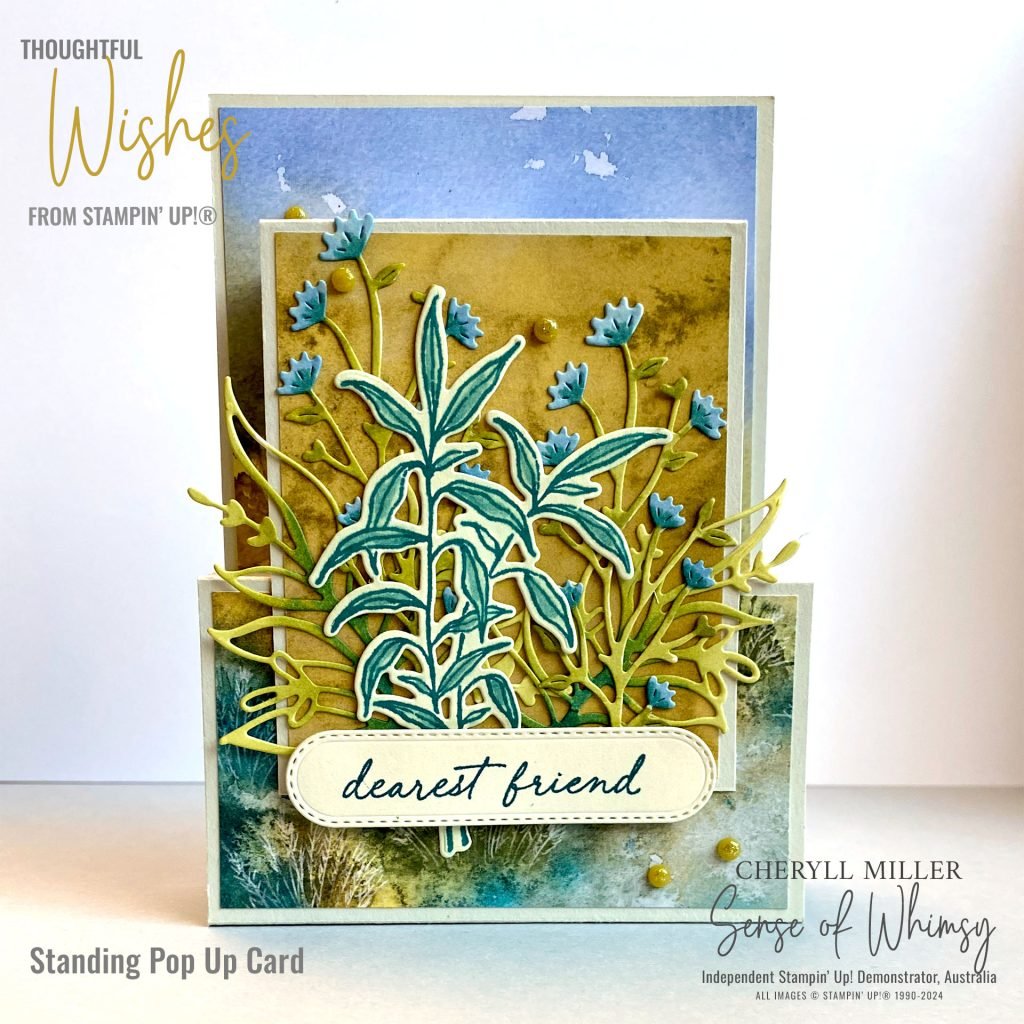
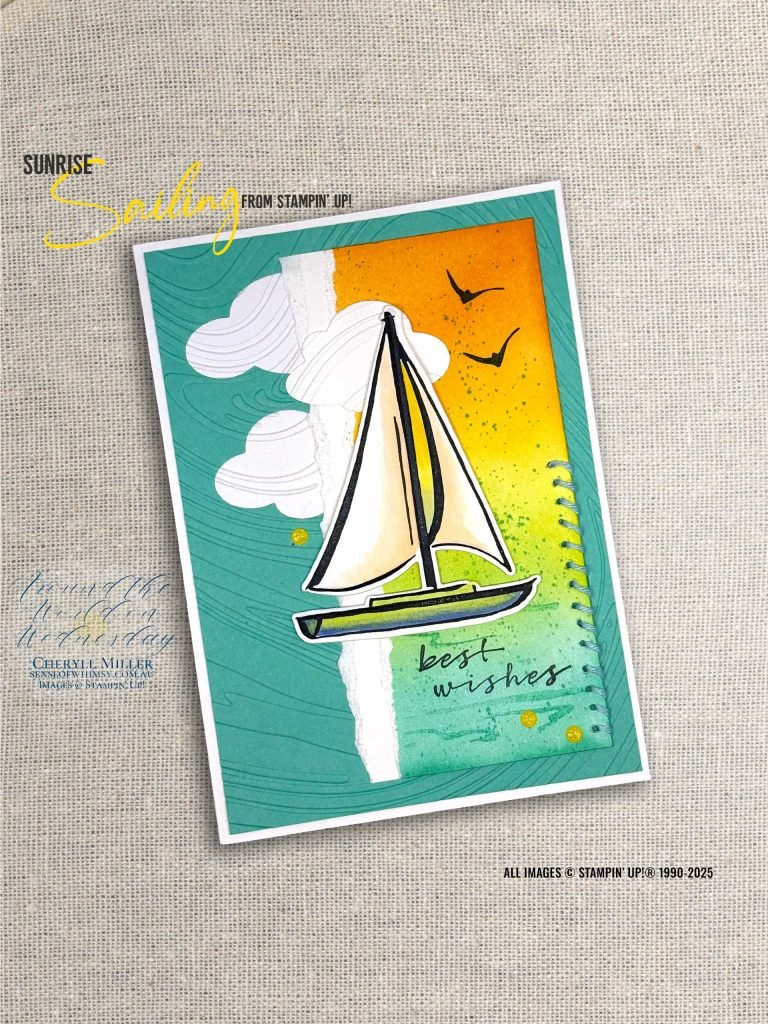
Standing Pop Up Card is my contribution to the Stamping Sunday Blog Hop as we unfold Fun Folds in September.

Standing Pop Up Card …
This is a fun fold I have been wanting to try for a very long time. I don’t usually do many cards which require precise measurements … I am a bit of a klutz and always seem to muck it up somewhere along the line … and leave a trail of “not-fun fold” mangled piles of card along the way. But this one is pretty easy … I first saw it on Split Coast Stampers, a great resource for all sorts of Stamping Techniques. The measurements are in Imperial, so I have converted into metric to fit into our standard sized envelope in Australia.
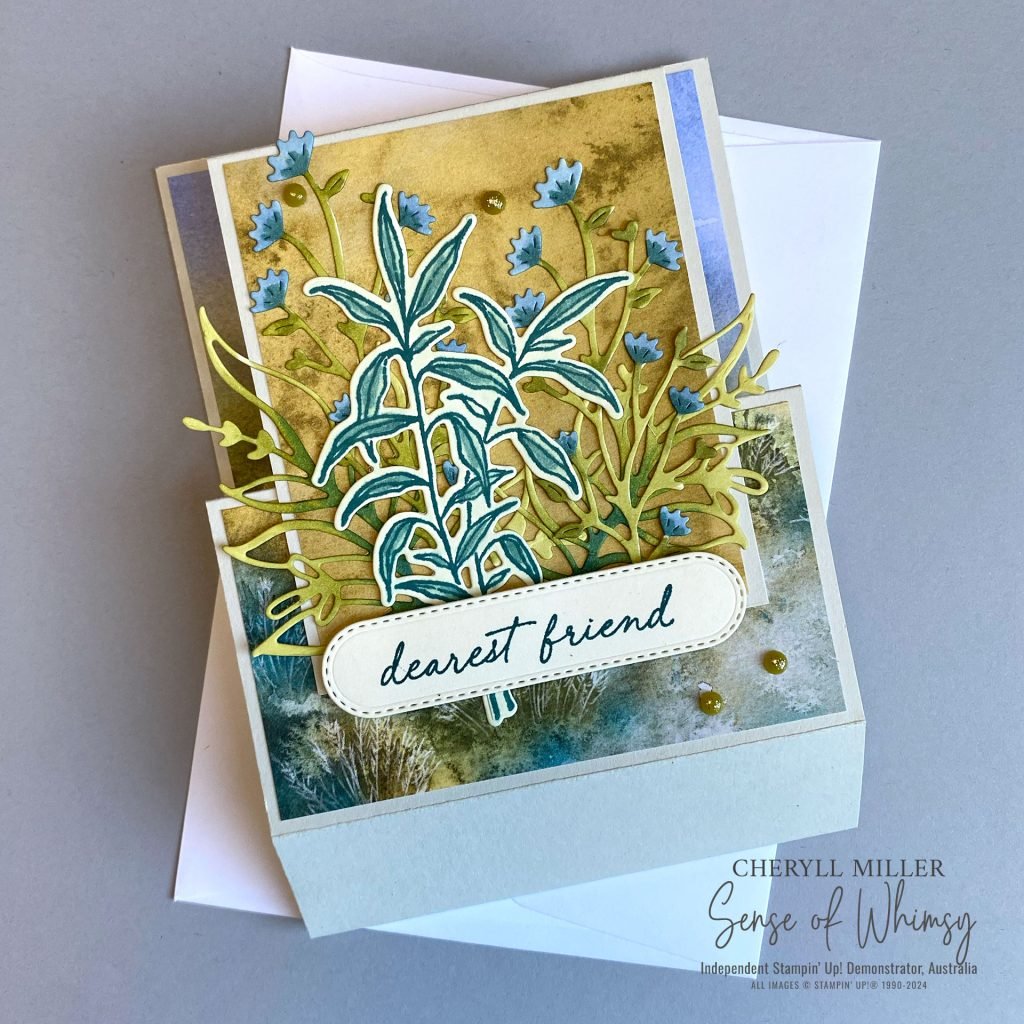
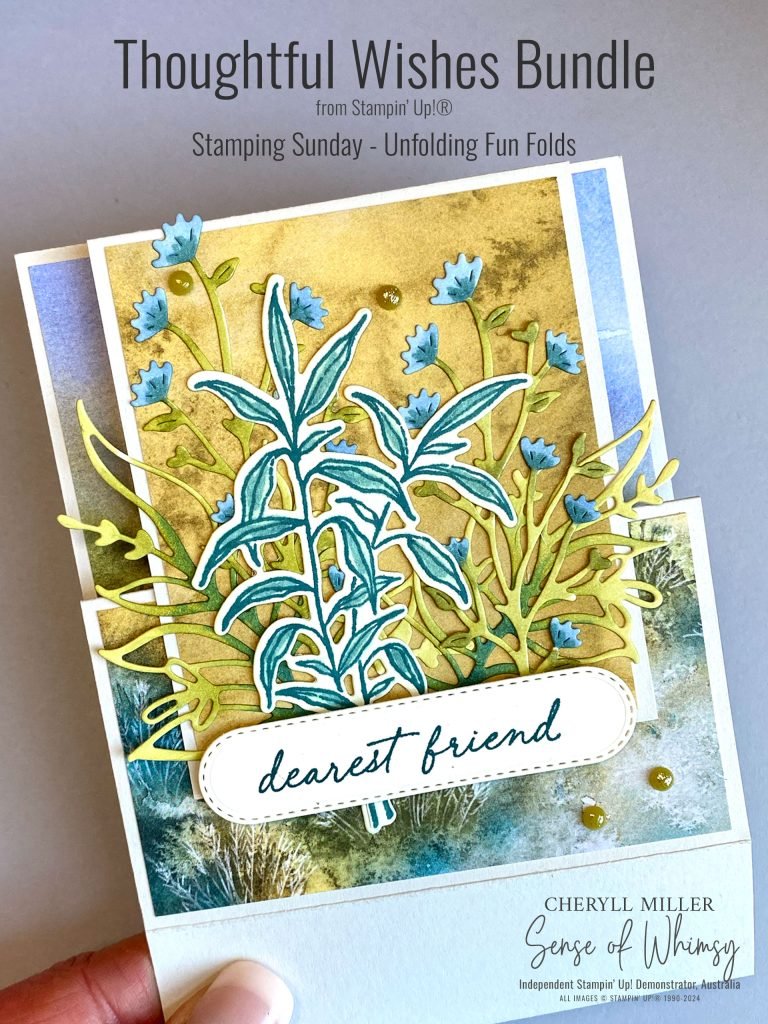
Thoughtful Wishes Bundle …
I have used the Thoughtful Wishes Stamp Set and Die Bundle, along with the Thoughtful Journey Designer Series Paper to decorate this very simple fun fold. Measurements are given below.
MATERIALS
Cardstock and Designer Series Paper of your choice / Stamps and Dies to decorate / Inks & Stampin’ Blends for Colouring / Paper Trimmer / Tear & Tape
*For a full list of supplies I used, click on the first image or scroll on down to the bottom of this blog post.*
Measurements …
Metric:
Base Cardstock – 10.5 cm wide x 28.3 cm long … score along the long edge at 1.5 cm, 4.5 cm, 10.5 cm and 13.5 cm
Front Flap Cardstock – 8 cm wide x 14 cm long … score along the long edge at 1.5 cm and 4.5 cm
Designer Series Paper (I used Thoughtful Journey DSP for this card)
– Base Card back panel – 10 cm wide x 9.5 cm high
– Base Card front panel – 10 cm wide x 5.5 cm high
– Front Flap panel – 7.5 cm wide x 9 cm high
Back of Card matting cardstock – 10 cm wide x 14.3 cm high
Back of Card writing panel – 9.7 cm wide x 14 cm high
Imperial: (slightly different to the Split Coast Stampers Tutorial)
Base Cardstock – 4-1/4″ wide x 10-1/2″ cm long … score along the long edge at 1/2″, 1-3/4″, 3-3/4″ and 5″
Front Flap Cardstock – 3″ wide x 5-1/2″ long … score along the long edge at 1/2″ and 1-3/4″
Designer Series Paper (I used Thoughtful Journey DSP for this card)
– Base Card back panel – 4″ wide x 4-1/4″ high
– Base Card front panel – 4″ wide x 1-3/4″ high
– Front Flap panel – 2-3/4″ wide x 3″ high
Back of Card matting cardstock – 4″ wide x 5-1/4″ high
Back of Card writing panel – 3-3/4″ wide x 5″ high
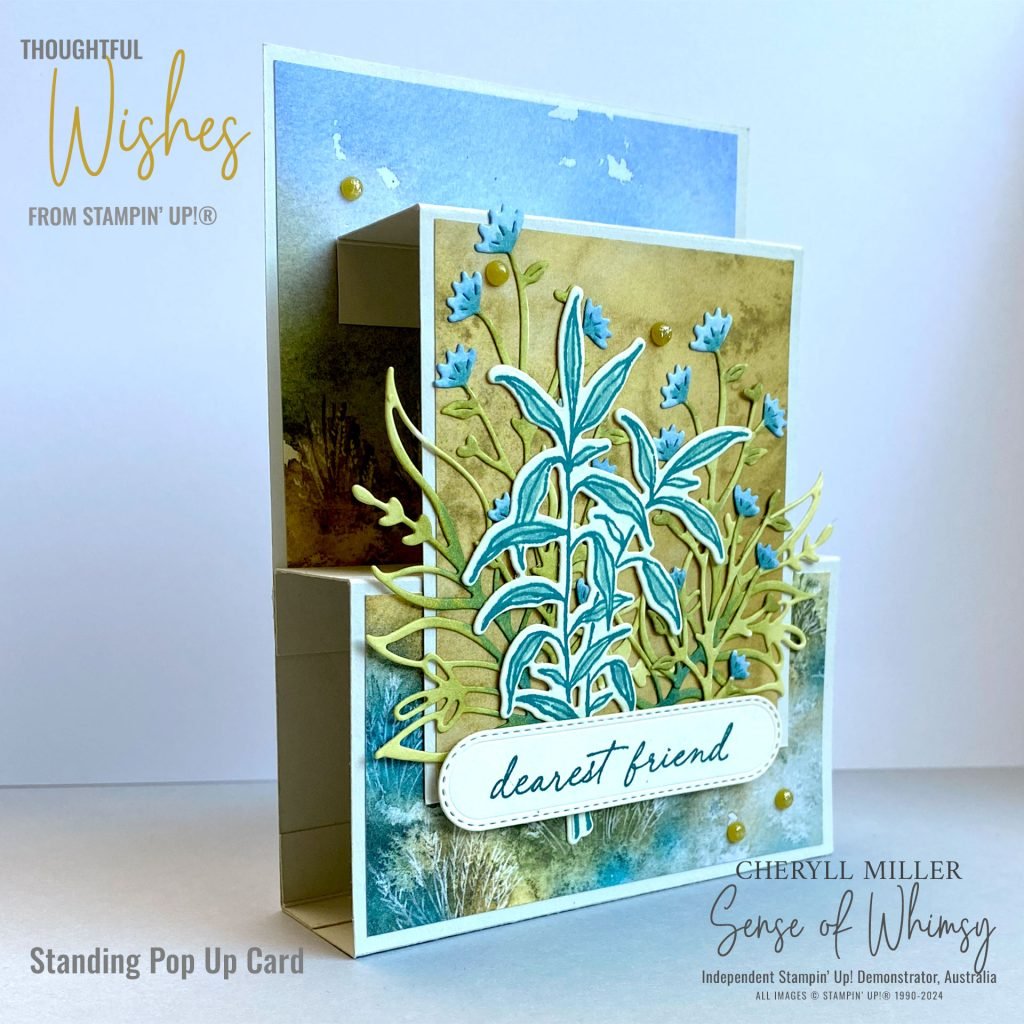
I did add a little folded spine to the base of the card to help it sit upright on display.
Basic Beige Cardstock – Metric 10.5 cm x 2.5 cm, scored and folded in half lengthways
Basic Beigh Cardstock – Imperial 4-1/4″ x 1″, scored and folded in half lengthways
This card folds flat to fit in a standard sized envelope. The only place to write your greeting on this card is on the back, so it has been decorated ready to write your special message to that dear friend.

I missed the “go live” time for the hop this month, but the other designers have some fabulous fun folds to show case, so hop on over to Yvonne Spikman’s blog first, then follow the hop all the way through the entire blog hop list. I know you will be thrilled by the creativity. I am off to check out all the amazing designer’s projects now … don’t forget to leave comments as you go. We love comments so we know you are out there and looking at our creations.
I hope to be more on the ball next month …. see you then!
xx Cheryll
Here is a visual list of the items I used to create this card .. click on an image to see it in more detail.
Product List ") |  |  | ||
 |  |  |
 Designer Series Paper")


Gorgeous card Cheryll! I love the design and the colors are beautiful! I need to try making one of these!
Thanks so much Tami! xxx