
Stamping Sunday Blog Hop – Nurture Nature
![]()
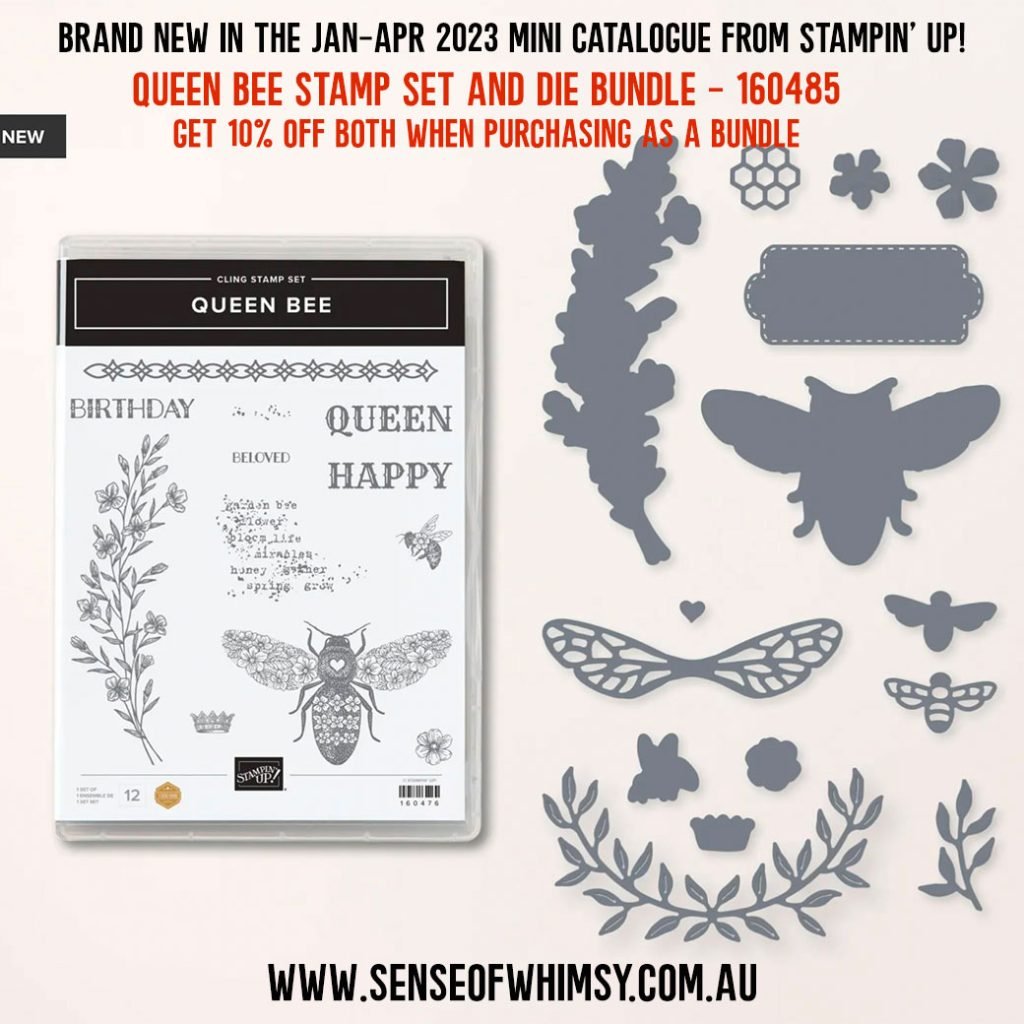
Queen Bee Bundle is one of the amazing bundles from the Stampin’ Up! Jan-Apr 2023 Mini Catalogue and I am featuring this bundle today in my creation for our Stamping Sunday Blog Hop.

Welcome to my blog on this second
I have chosen to go with the “Nature” theme, and as we have become “bee-keepers” at our place during 2022, I chose to create a card with the Queen Bee Bundle. Bees are naturally nurturing (well the worker bees anyway … the drones don’t actually do too much nurturing).
Usually I create a Beginner, Casual and Avid card … but with this one being an over the top avid card, I am hoping that everyone will forgive me for just the one card today.

Queen Bee Bundle
The Queen Bee Bundle is on page 26 of the Mini Catalogue and is a Cling Rubber Stamp Set and co-ordinating Dies.
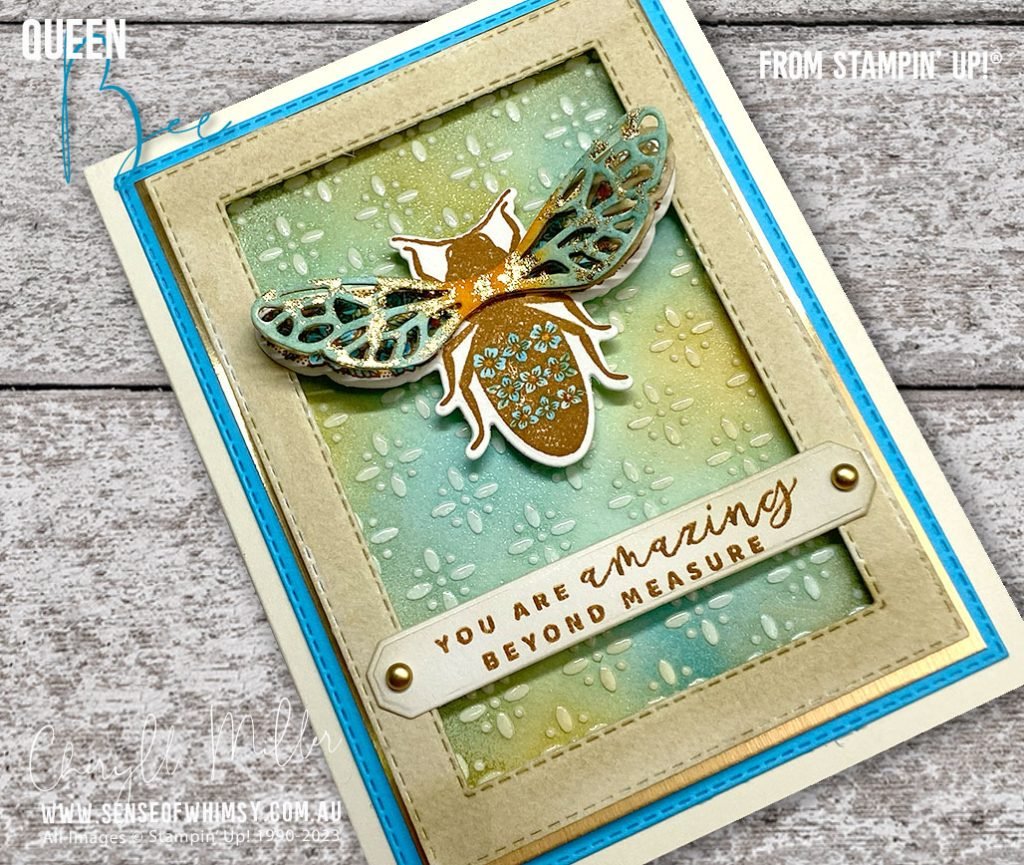
An avid Queen Bee card …
There are so many steps to this project … none are particularly difficult, but it is a card for a more dedicated crafter who likes to “lose themselves” in their craft room for a few hours. Let’s have a closer look.

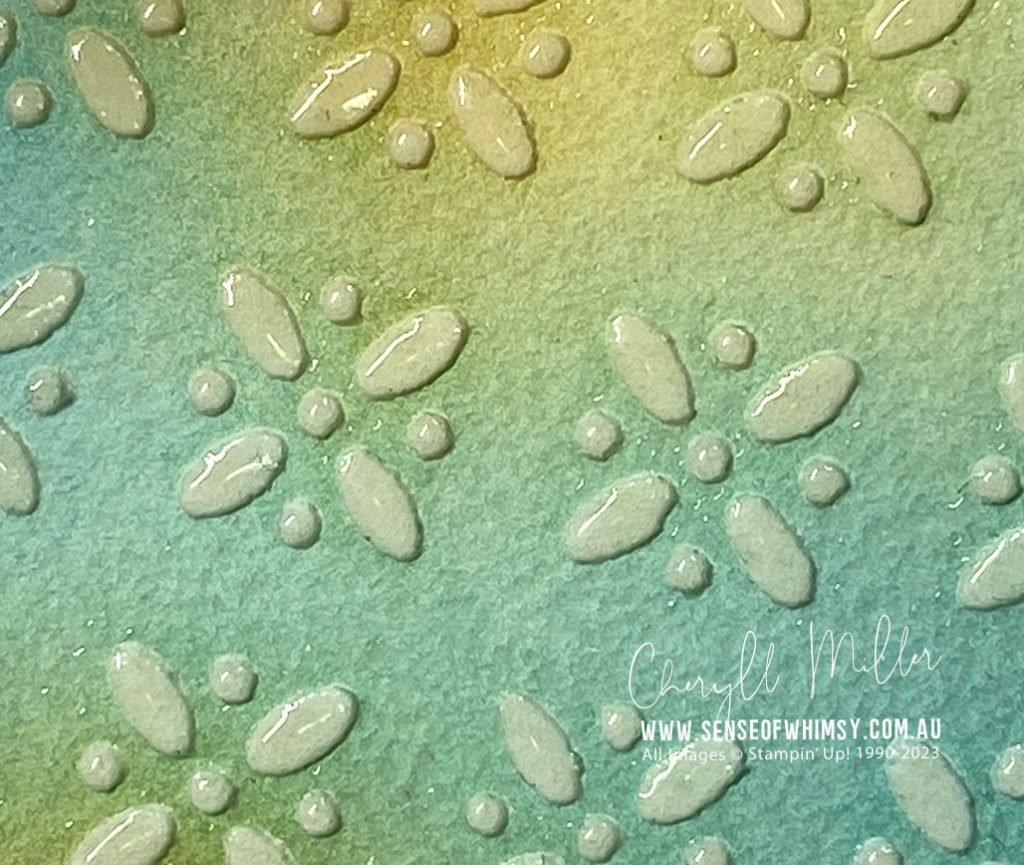
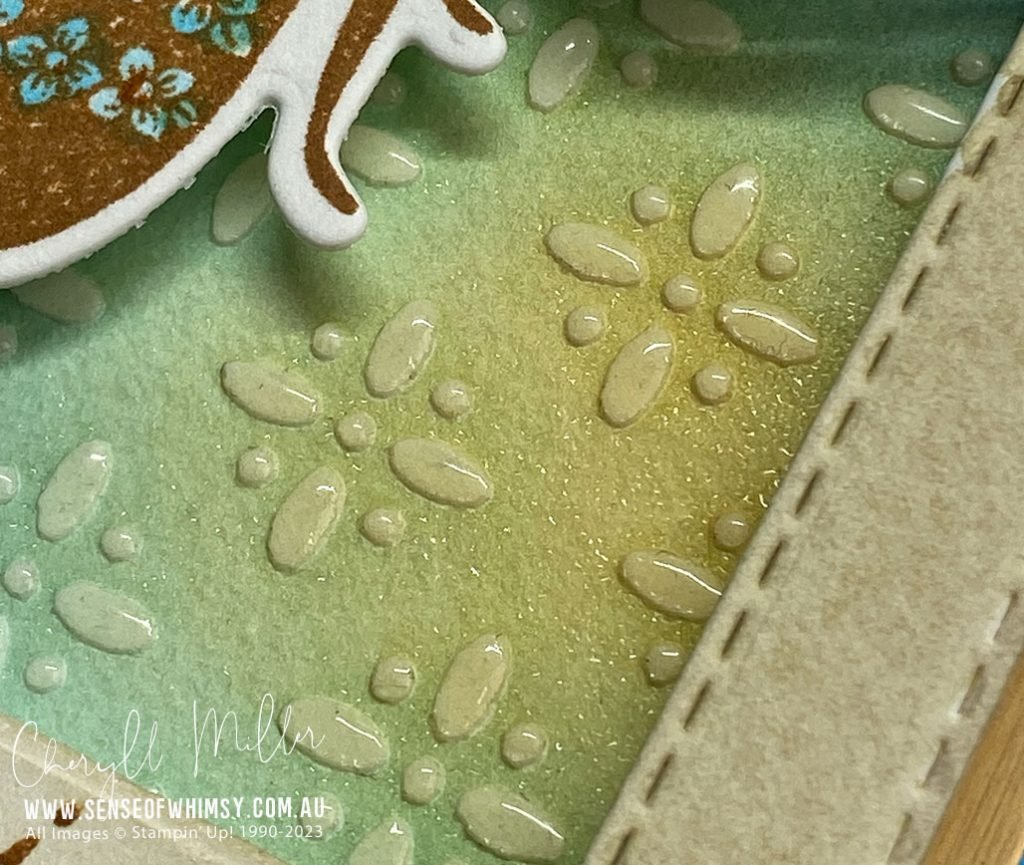
I started on the background first. Working on Fluid 100 Watercolour Paper, I used a mask from the Artistic Mix Decorative Masks set and applied Embossing Paste through the stencil. Once it was dry I used blending brushes to apply colour (Pool Party, Tahitian Tide and Pumpkin Pie … be light handed with the Pumpkin Pie).
Once the ink was dry, I replaced the stencil over the panel, matching it up exactly, and “pounced” Versamark ink through the stencil onto the embossing paste design using a Sponge Dauber. I then sprinkled with Clear Embossing Powder, tapped off the excess, and heated with a heat tool. Be careful not to overheat the powder, as this will cause the Embossing Paste to bubble. WOW!!!!! This is amazing … I can’t describe how excited I was at how well this turned out. Which is a bit tragic really … but that’s me .. an artistic tragic!! 🙂
Next up I created my Queen Bee. She has been stamped in Saddle Brown Stazon Ink on Fluid 100 Watercolour paper (I used the Stamparatus so I could stamp twice … the texture in the Watercolour Paper can require a second stamping). I watercoloured her using the same inks as the background, Pool Party, Tahitian Tide and Pumpkin Pie, before die cutting.
I die cut 2 of the detailed wings from Honey Bee Dies from Fluid 100 Watercolour Paper and watercoloured one with Crumb Cake ink. The second set of wings was watercoloured with the same three ink colours I have already used, Pumpkin Pie, Tahitian Tide and Pool Party. I applied Versamark to the wings sparingly with a sponge dauber, sprinkled with Heat and Stick Powder, and heated until melted. This takes a very short amount of time .. don’t overheat the powder. Immediately apply Gold Leafing and rub it onto the butterfly wings. The Gold leaf will stick anywhere the powder has melted. You can repeat this process if you want more gold leafing.
I adhered the Crumb Cake wings to the Queen Bee using Mini Glue dots, only in the center/body part of the bee, and then adhered the colourful wings over the top. Both sets of wings sit up away from the body of the Queen Bee.

I pulled out two different products for the sentiment … “You are Amazing Beyond Measure” is a fabulous nurturing sentiment … it comes from the Season of Chic Stamp Set. It has been stamped with Saddle Brown Stazon Ink, onto Shimmery White Cardstock, and die cut with the long die from the Harvest dies. I had to cut it a little shorter to fit nicely across the card.

I layered the background panel onto some gold Brushed Metallic Cardstock, and then onto a panel of Tahitian Tide cardstock, die cut with the largest Stitched Rectangle Die.
The frame has been created by die cutting the second largest and fourth largest Stitched Rectangle Dies out of Fluid 100 Watercolour Paper. I watercoloured with Crumb Cake ink and mounted it up with Foam Adhesive Strips over the background panel.
The Queen Bee and the sentiment piece reach across the frame. I have mounted them with smaller pieces of the foam adhesive strips so they sit at the same height, adhering the very edges of both to the frame with Liquid Glue.
Stamping Sunday Blog Hop Design Team …
I am really looking forward to seeing what the other team members have created today. To move forward in the hop, head on over to Jay Soriano’s blog here. Or to go back to the previous blog, head back to Vicki Boucher’s blog here.
Here is a list of all the blog hop participants….
Cheryl, I love how you created the background! Unique and fun! TFS!
Thanks so much Melissa, lovely of you to stop by and leave such a fabulous comment! 🙂 xx
This is just gorgeous thanks for sharing
Ang
Thanks so much for your lovely comment Ang.I appreciate it, and you are very welcome.
Hi Cheryll.
WOW!!! What a magnificent card. I love it. The colours, the textures, the techniques. Everythig.
Now, why am I surprised? You always do such beautiful cards.
Awww… thank you Sharon! I really appreciate your support, as always! 🙂 xxxx
Wow! What a stunning card Cheryll! xx
Thanks so much Sharryn! And my craft room smells lovely … thank you! 🙂
Wow, wow, wow!!! What a work of art! That embossed background is beautiful and such a cool technique! I need to get some stencils so I an try it. And then there’s the gorgeous colors, gold leafing, and layers. I’m just blown away!
Thanks so much Tami … you have just made my night! 🙂 xxx