Gears & Textures – Lots of layers for a masculine card + Video
![]()
Gears & Textures Bundle is new product come up in the Jan to April 2026 Mini Catalogue from Stampin’ Up! This catalogue goes live on 6th January, and I can highly recommend that you add this fabulous bundle to your shopping cart.
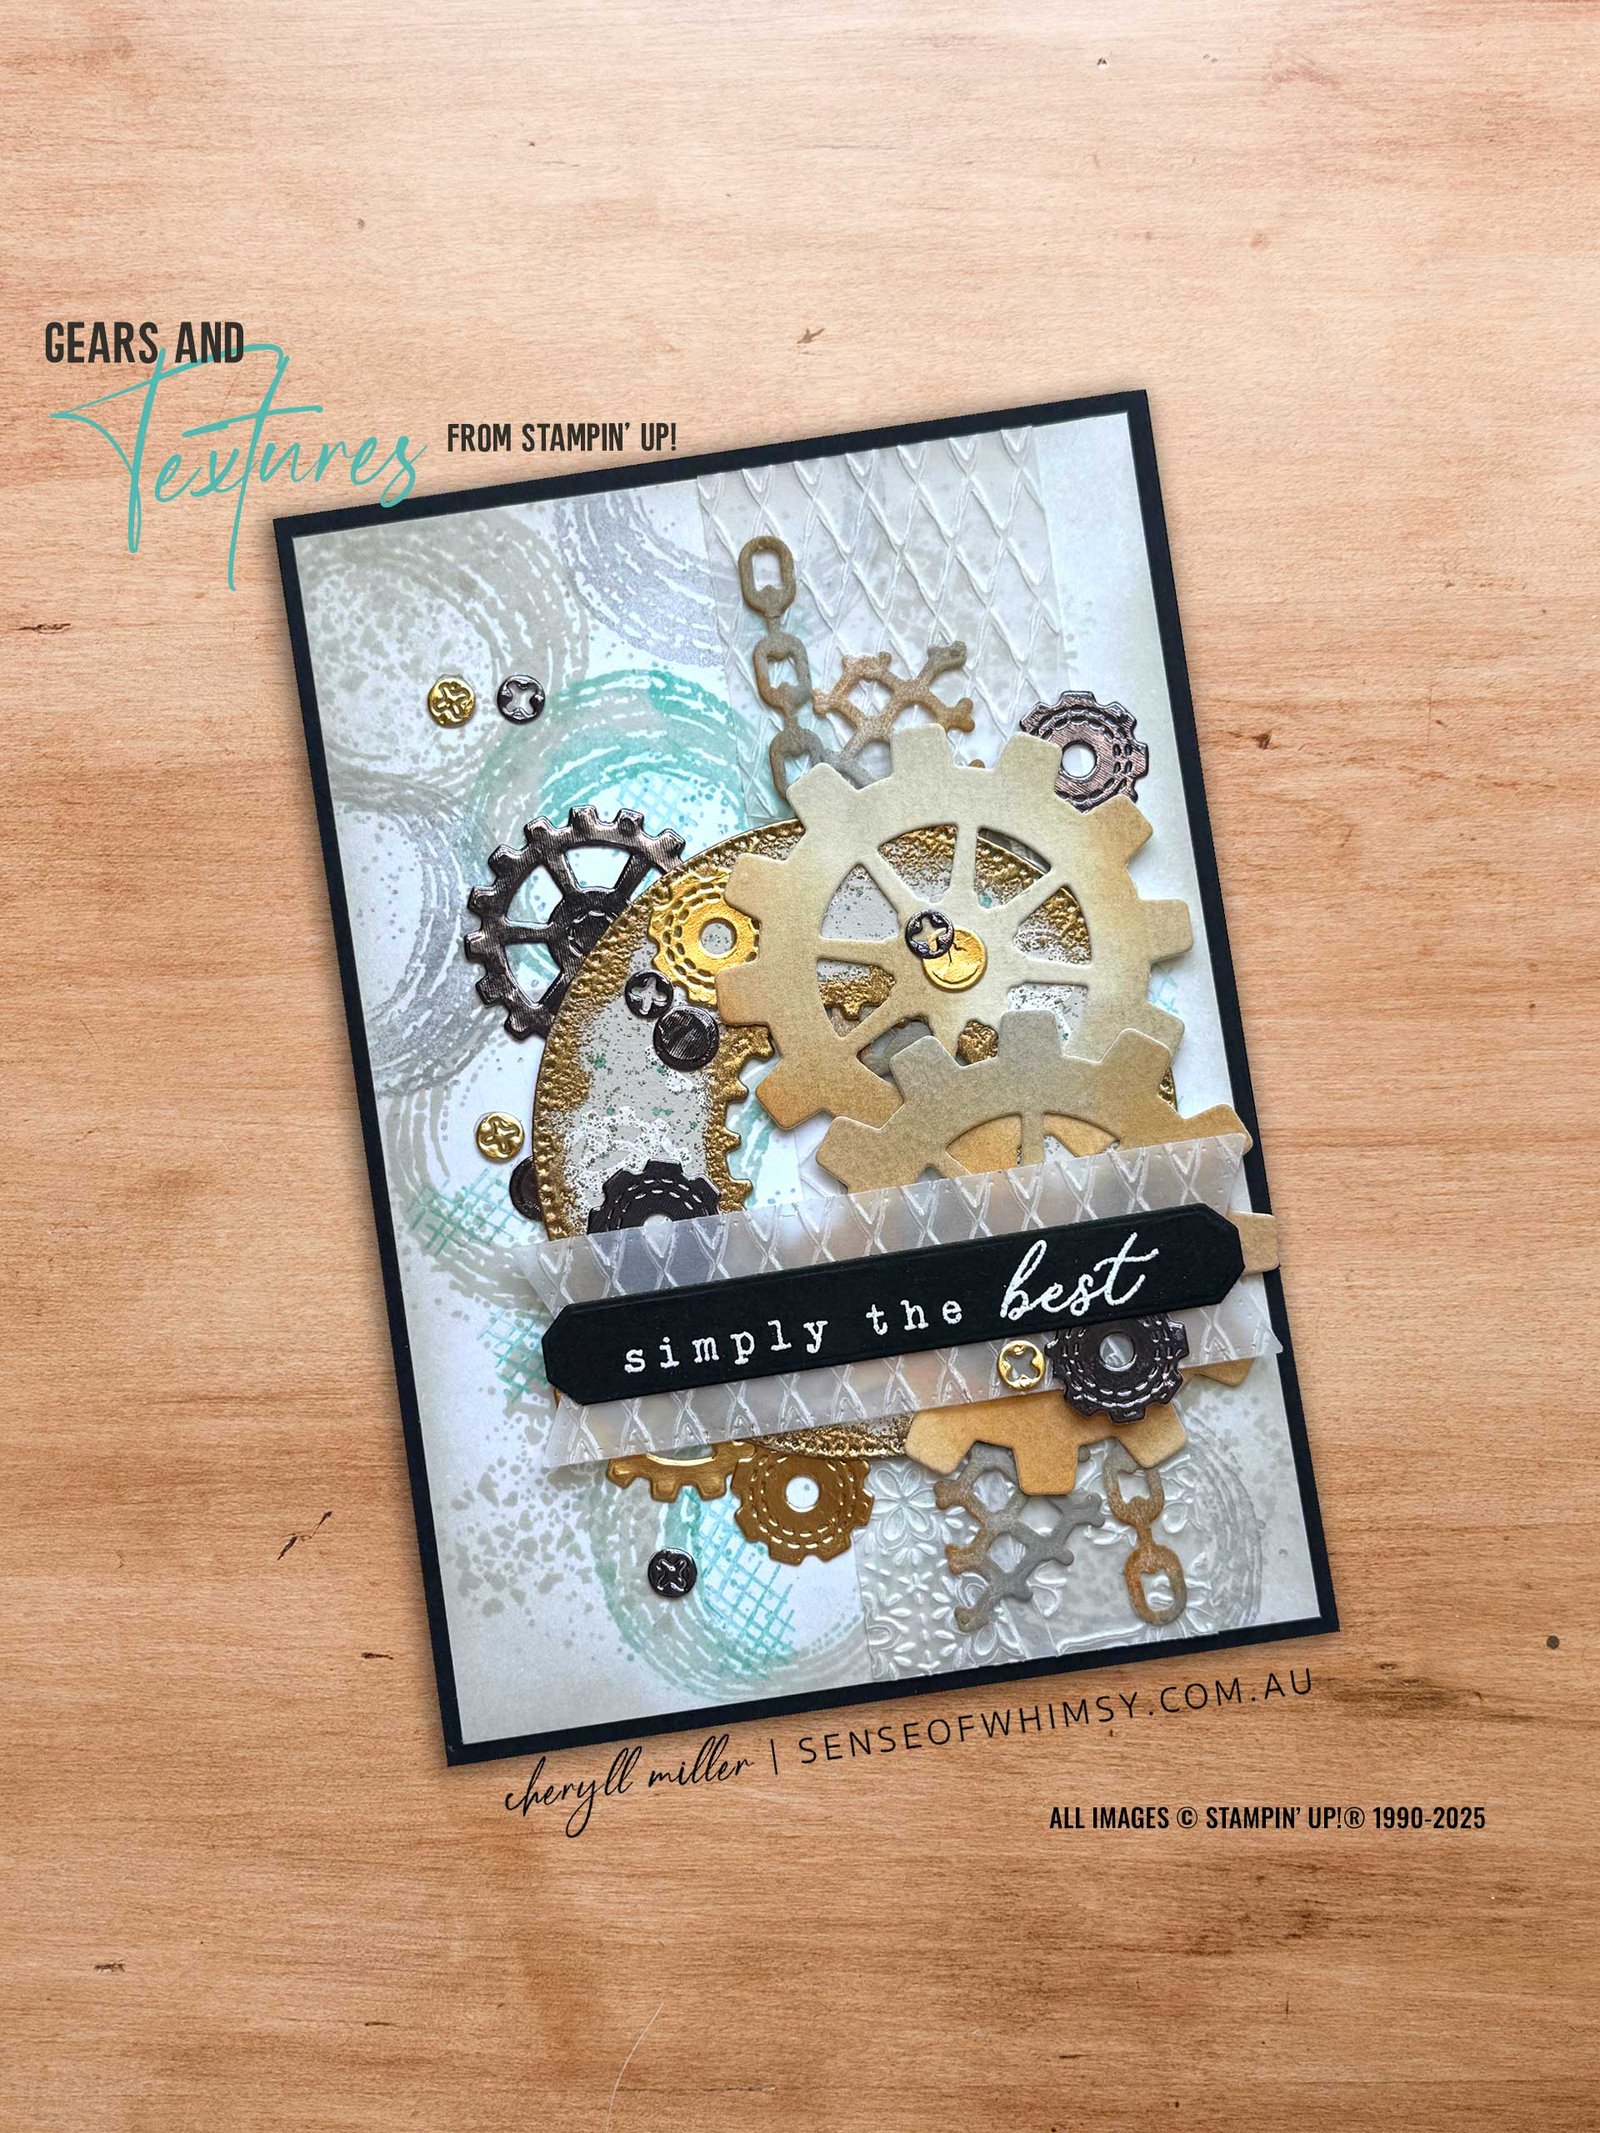
I used the bundle to create this slightly over the top masculine card, full of layers and techniques, for my weekly YouTube Live last Thursday. Because I know that not everyone likes creating card with so many steps, I also created a simpler version as well.
Gears & Textures with loads of layering …
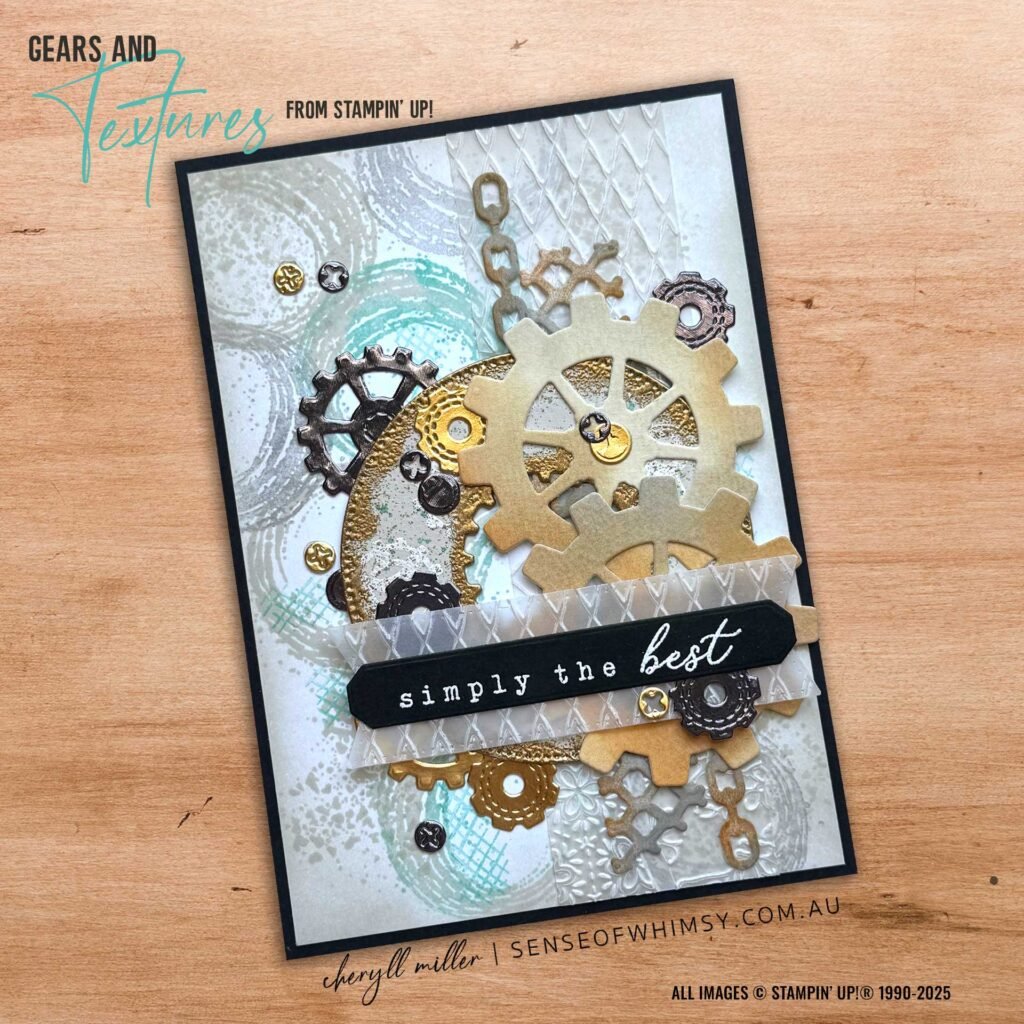
The textural stamps are perfect for creating your own background layer, I have used neutrals and a splash of Coastal Cabana. The die cut gears and cogs include heat embossing, watercolouring, splattering, ink blending and a touch of metallic card. I have also used some vellum in the background and behind the sentiment, embossed with the Joined Together embossing folder for yet even more texture.
The large circular element that ties all the smaller cogs and gears together is cut from the Stylish Shapes dies, with a smaller gear die cut from the centre.
The sentiment is from another new Stamp Set from the Jan to Apr 2026 Mini Catalogue … “Beautifully Celebrated”. I white heat embossed the sentiment onto black card and then die cut it with one of the sentiment holders from the “Words of Beauty” dies (Online Exclusive released in November).
The card base is Basic Black to tie in with the sentiment, and the Pewter Metallic die cut pieces scattered throughout also adds a darker contrast element to the card.
And a slightly less involved version …
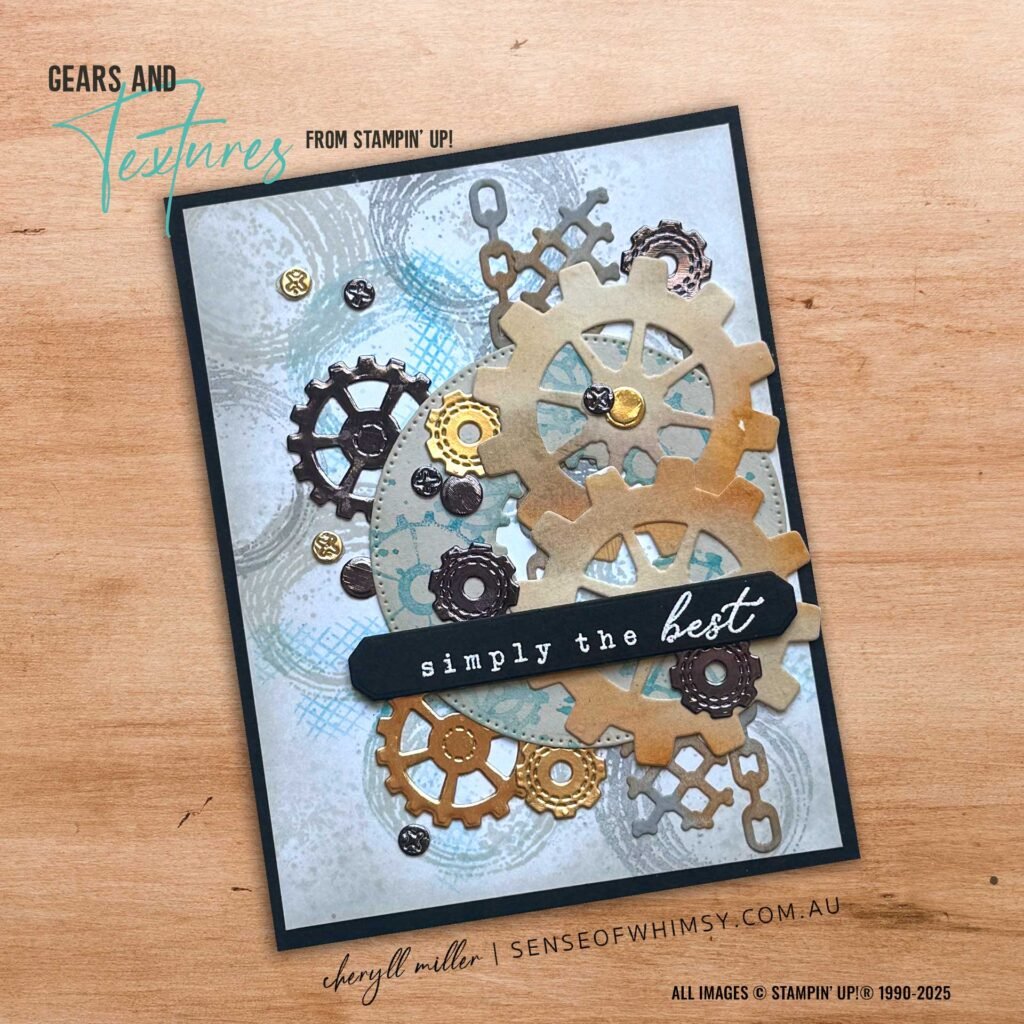
I created this one in the video also … The blue ink colour is Azure Afternoon, but I used the same Neutral shades, Basic Beige, Smokey Slate and Pecan Pie. It has a lot of the same elements, but I did leave out quite a few steps. For instance, I didn’t use any vellum in this card, and the large circular element is just stamped with the gear images and Azure Afternoon ink (I left off the white and gold embossing).
Everything else is pretty much the same … the most time consuming thing is die cutting all the gears and cogs. Those little tiny screws are a little fiddly. In the end, I found the easiest thing was to die cut them and try and keep the centre piece in the shape, applying both to a glue dot on the roll. Then it was easy to lift them both off with my Take your Pick Tool and adhere them onto the card.
Whimsy Weekday Creative Live #164 …
I go live on YouTube every Thursday (in Australia) at 11:30am South Australia time (that’s 11:00am in Queensland and 12:00 Noon in other Eastern States). If you subscribe to my YouTube channel and then click on Notifications, you should get a reminder when I go live. I would love to have you join me and my regular viewers as we chat and craft. You will need to be logged into YouTube to be able to join in the chat.
Of course, you can always catch the replay at a later time.
Subscribe to my newsletter for full PDF tutorial …
The full tutorial with measurements and supplies will be included in my Newsletter for week beginning 5th January …. subscribe here.
xx Cheryll
Shop Online Exclusives (items not in a catalogue): CLICK HERE!
Request a printed catalogue: CLICK HERE!
Join Stampin’ Up!® to get a 20% discount on your crafting purchases. CLICK HERE!
Subscribe to my newsletter to keep up to date with the latest news: CLICK HERE!
Weekly Videos uploaded on my YouTube Channel: CLICK HERE!
If you would like to stay in touch via Facebook: CLICK HERE!
Follow me on Instagram: CLICK HERE!

Beautifully designed, Cheryl. Saw this card on SCS and popped over to watch your video. Fabulous stamping and techniques. You are very talented.
Aaaw! Thanks so much Nancy! xx
Beautiful, Cheryll! Love all those fabulous layers. The touches of embossing are next level!
Thank you so much Jan! xxx