
Delightful Wishes This or That … Around the World on Wednesday
![]()
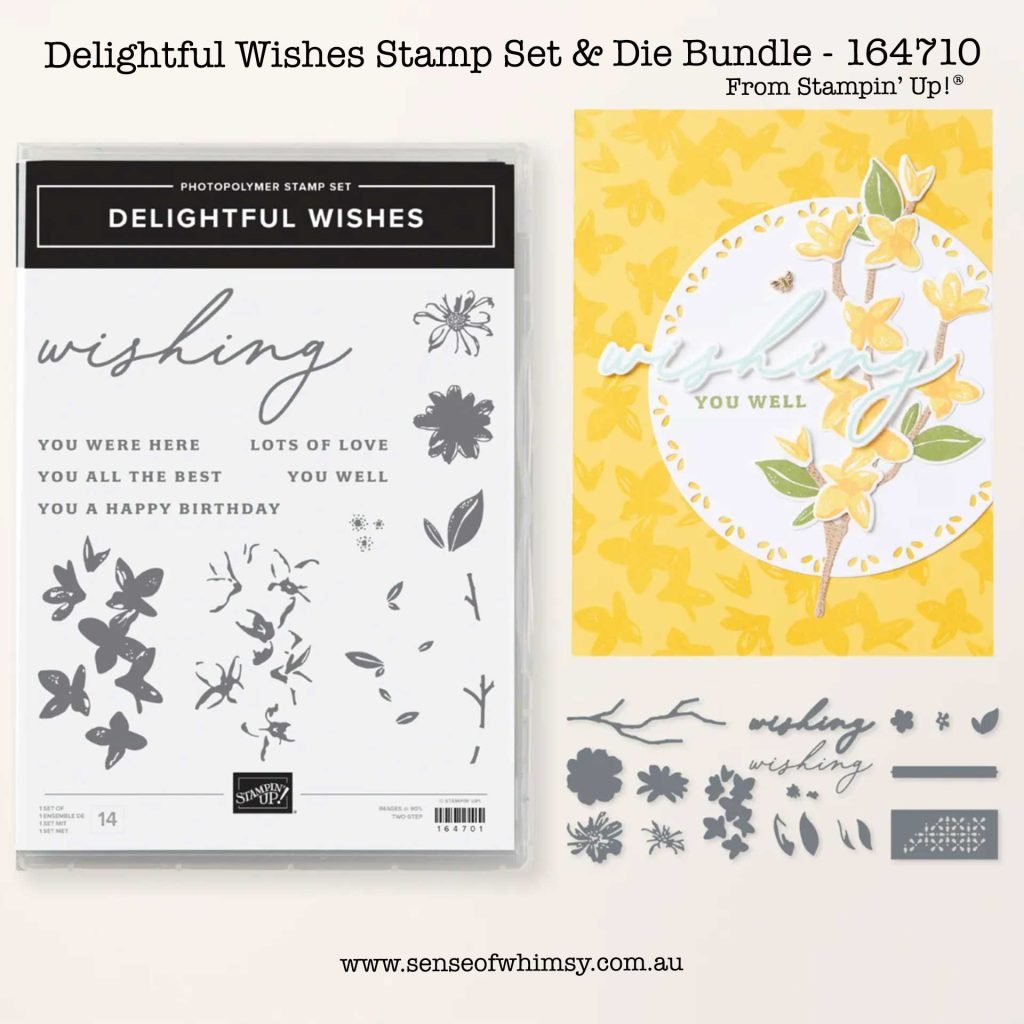
Delightful Wishes Bundle … new product from the just released Jan-Apr 2025 Mini Catalogue … has been used for the Around the World on Wednesday blog hop where we ask “this or that?”

Welcome once again to Around the World on Wednesday Blog Hop, travelling around the world through every time zone. You may be starting your trip Around the World here or you may have come from the blog of amazing artist Rochelle Laird-Smith. Always excited to see what Rochelle has created.
Around the World on Wednesday Blog Hop is the brainchild of Angie McKenzie, a wonderful friend and amazing paper artist. My name is Cheryll Miller, and I am so delighted to be a part of this varied and talented group of Stampin’ Up!® Demonstrators.
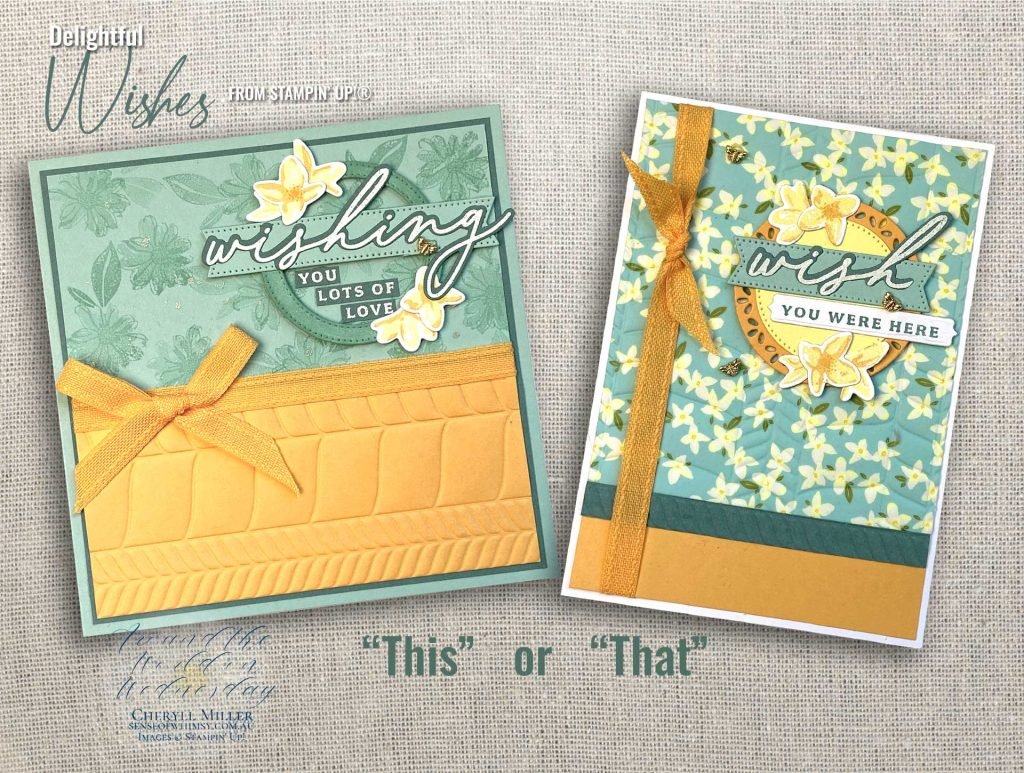
This or That? …
Kicking off 2025 with a little bit of decision making …. This or That? I have created two cards using the Delightful Wishes bundle, new product from the just released Jan-Apr 2025 Mini Catalogue. Your mission, should you choose to accept it, is to choose ….. This or That?
Two card projects that are both the same, but different. I have used some elements in both projects to tie them together, but added different elements to create a point of difference. I used colours from the Designer Series Paper, but highlighted Peach Pie with just a touch of yellow.
Delightful Wishes Bundle …
This …
It’s a square card … I don’t do square cards very often as I am too lazy to make an envelope to suit. But just lately, I have been enjoying playing with the different layout options a square card offers.

Materials for “This” Square Card
Delightful Wishes Stamp Set and Die Bundle / Modern Herringbone Embossing Folder / Stylish Shapes Dies / Pool Party Cardstock and Pool Party Ink / Peach Pie Cardstock / Peach Pie and Lemon Lolly inks / Lost Lagoon Cardstock / Wink of Stella Glitter Pen / Peach Pie Bordered Ribbon / Tiny Bee Trinkets / Versamark Ink Pad / WOW White Embossing Powder / Embossing Tool Kit / Heat Tool
*For a full list of supplies I used, click on the first image or scroll on down to the bottom of this blog post.*
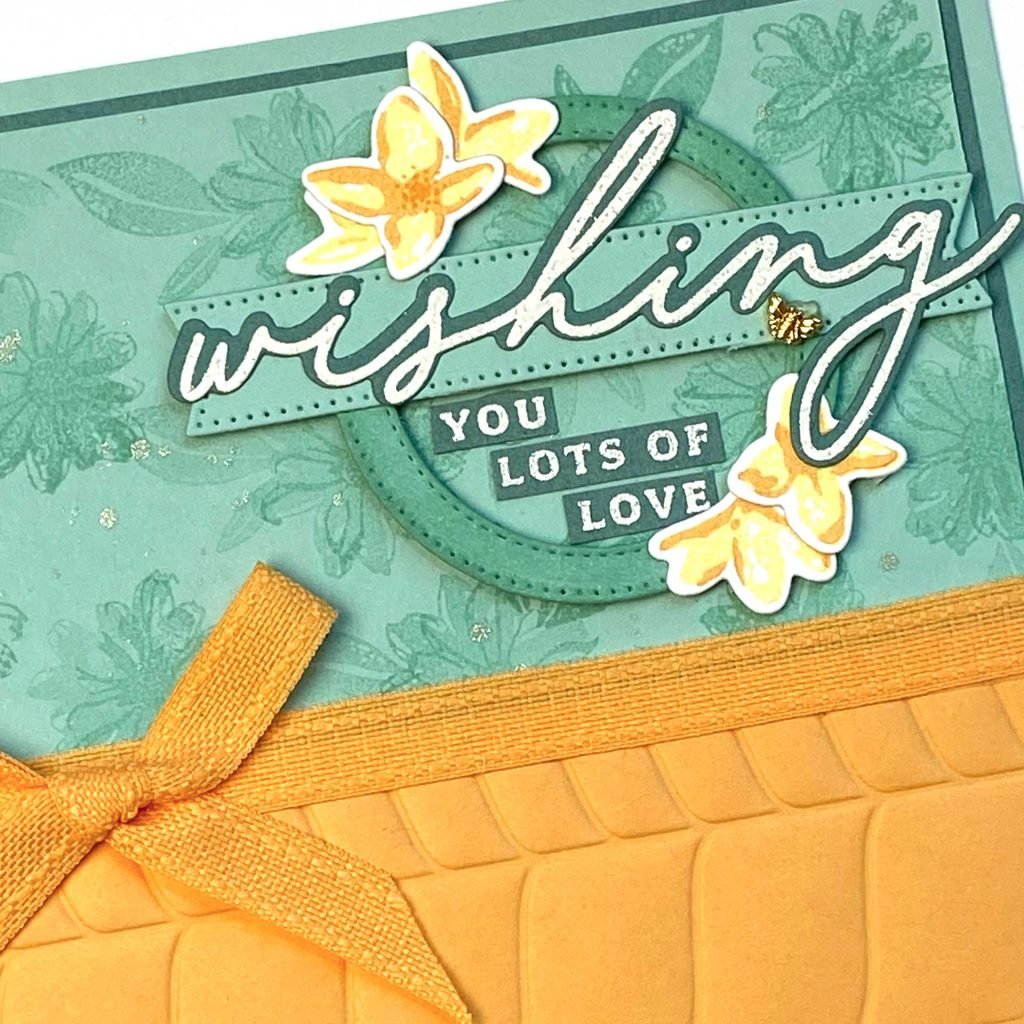
Design Tips
* Create your own patterned paper by stamping flowers and leaves onto Pool Party cardstock using Pool Party ink.
* Add some sparkle with a splatter with Wink of Stella Glitter Pen.
* Emboss Peach Pie cardstock panel with Modern Herringbone Embossing Folder. I chose this folder because it had a strong open look pattern, a nice contrast to the flowers, but any embossing folder will work.
* After adhering the two panels to create a 13cm x 13cm square, I concealed the join the with Peach Pie Bordered Ribbon and then adhered a separately tied bow to the ribbon with Mini Glue Dots.
* For the circular element on this one, I used the Stylish Shapes Dies and cut two of the stitched circles to create a frame with Pool Party cardstock, which I added some Pool Party ink to to give it a slightly darker shade so it stands out from the background. I also cut a flagged banner shape from Pool Party card and adhered across the circle. Both the circle frame and the banner are popped up with Dimensionals.
* I white heat embossed the large “wishing” word onto Lost Lagoon cardstock and then die cut with the co-ordinating die. I also did the same with the small words. and hand trimmed.
* The flowers are all one stamp …or should I say two stamps as this is a two step stamping process. I used Peach Pie and Lemon Lolly to stamp the flowers. The one die cuts out all the individual flowers.
That …
Back to my comfort zone and a standard C6 sized folded card for the second project. I incorporated this pretty vellum design for the floral background this time.
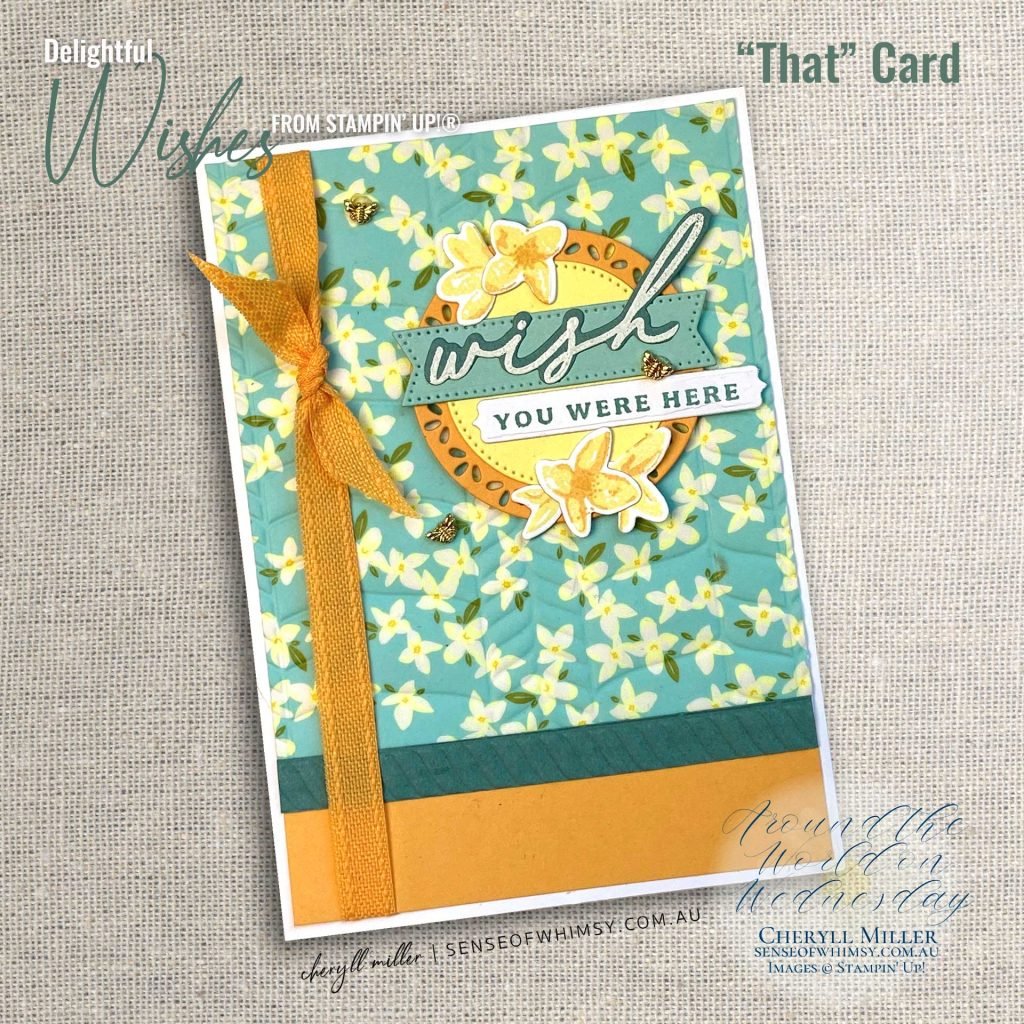
Materials for “This” Square Card
Delightful Wishes Stamp Set and Die Bundle / Floral & Gingham Vellum / Modern Herringbone Embossing Folder / Stylish Shapes Dies / Spotlight on Nature Dies / Pool Party, Peach Pie, Lemon Lolly and Lost Lagoon Cardstock / Peach Pie, Lemon Lolly and Lost Lagoon inks / Peach Pie Bordered Ribbon / Tiny Bee Trinkets / Versamark Ink Pad / WOW White Embossing Powder / Embossing Tool Kit / Heat Tool
*For a full list of supplies I used, click on the first image or scroll on down to the bottom of this blog post.*

Design Tips
* Apply liquid glue to back of floral patterned vellum and adhere to Basic White cardstock. Emboss the panels with Modern Herringbone Embossing Folder.
* Adhere to a smaller panel of Peach Pie cardstock to create a single layer to fit on standard folded card front.
* The smaller strip of Lost Lagoon cardstock has been embossed with Modern Herringbone Embossing Folder and adhered to panels to cover the join.
* I used the Peach Pie Bordered Ribbon and tied it longways around the left hand edge of panel, tying with a double knot.
* For the circular element on this one, I used the Stylish Shapes Dies and Spotlight on Nature dies. Once adhered together, the circles are popped up with Dimensionals.
* I white heat embossed the large “wishing” word onto Lost Lagoon cardstock and then die cut with the co-ordinating die. I trimmed it to just be “Wish” and adhered to a Pool Party stitched banner from Stylish Shapes Dies. The words “You Were Here” were stamped on white card with Lost Lagoon cardstock and die cut with the banner die (cut smaller to suit the words).
* The flowers are created in the same way as the first card.
* The Tiny Bee Trinkets complete the card.
So what do you think? Let me know which is your favourite in the comments. 🙂
xx Cheryll
This is the Around the World on Wednesday design team! I am very excited to see everyone’s projects this month and maybe learn a new technique or two.
Click through each team member’s blog for loads of inspiration ….
Next up we are are going to take a trip all the way across the ocean to Ximena Morales in Germany … that’s quite a hop … Ximena always creates something amazing. I am going to grab a cuppa and check out all the projects … and get prepared to be inspired.

Jan Clothier – NZ
Leonie Stuart – AU
Rochelle Laird-Smith – AU
Cheryll Miller – AU
Ximena Morales – DE
Aurélie Fabre – FR
Annette Ball – CA
Kelly Taranto – US
Chris Smith – US
Tricia Butts – US
Theresa McEntee – US
Bree Renwick – US
Lori Willcox – CA
Teri West – US


How lovely! Both of these have layers upon layers and like a good painting, benefit from a long look! Embossing the vellum – what a great idea. Also, this is such a pretty way to show how even when using the same products, you can get such different results.
Thank you Jan … a fun challenge again! Love this hop! xx
This is still my favourite project. I love the faux paper design and the use of the folding machine in a plain way. I also like the second design, but less so ^^ Well done for your work!
Thank you so much Aurélie! xxx
Both so beautiful Cheryll! I love the look of that embossing folder on your “This” card.
Thanks so much Teri! xx
Wonderful cards! So hard to choose. I love making my own designer series paper! If pressured I think I would choose the one with the embossed DSP. Or no wait the one that you made the background for. Lol I don’t know. They’re both lovely!
lol … this is exactly what I did for all of the blog hop posts today! 🙂 So hard to make a choice! Thanks so much! xxx
Oh I love your 2 variations. The colour palette is a bit Aussie, Aussie, Aussie – it’s gorgeous. The Herringbone EF comes up so pretty. As much as I love the DSP, the tone-on-tone stamping looks so effective and it’s ‘This’ by a whisker for me. xx
Thank you so much! lol … Oy, Oy, Oy!!! Yes, I prefer the tone on tone stamping also. The little flowers remind me a little bit of frangipanis! 🙂 xx