
International Highlights July Winners Blog Hop; Gratitude Inspired by Thailand
![]()

So very excited to be voted in the top ten entires in Kylie’s International Blog Highlight in July with this card. Here is the post and a big thank you to everyone who voted for my card.

Gratitude Inspired by Thailand
The top ten winners now get to hop with Kylie, and the theme for our projects is the same “Gratitude inspired by Thailand”.
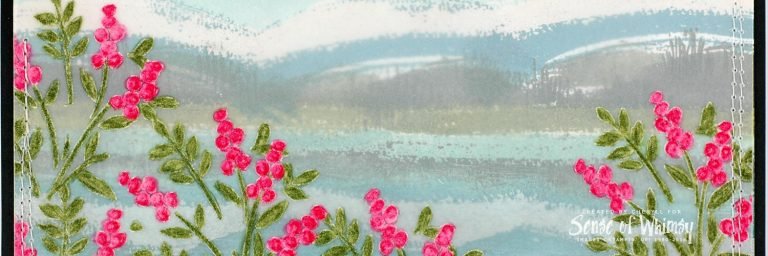
But what to create? For my previous project, I imagined being on a beach in Thailand, watching a beautiful sunset. For this project, I remembered that Kylie had shown us some gorgeous images of beautiful Thai ladies in traditional dress, beautiful patterned silk with lots of gold highlights.
So I pulled out any of my Stampin’ Up! goodies that included gold and created my take on a swathe of beautiful Thai Silk. If you aren’t a fan of green, best to look away now! 🙂

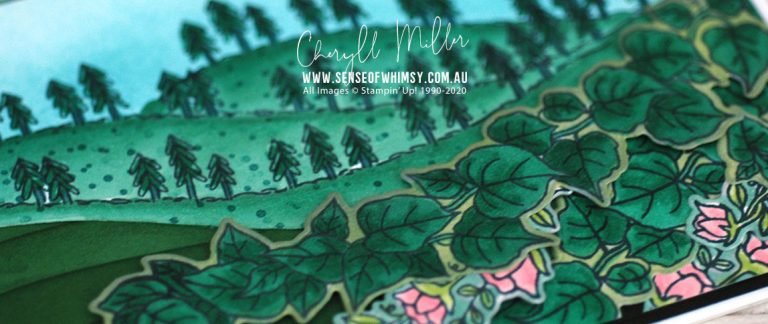
This card was such a blast to create. Here was my inspiration (thanks Mr Google). I used mostly Tranquil Tide colouring, so the green is a little bit different.

Applying ink over Gold Foil Patterned Paper.
Doesn’t the ink over the gold foil paper come up superbly? I used a sponge brayer to apply the ink right over the top of the gold foil patterned papers. The ink just wipes right off the gold foil, leaving a gold on colour design. I used the Gold Foil paper from the Eastern Palace Specialty Designer Series Paper because it is so exotic. And the little strips between the layers are one of the foil papers from the Bundle of Love Specialty Designer Series Paper.

Oh my! This has just opened up a ton of new designer series papers to use!!
Applying Ink over Designer Series Paper
So I then tried the same thing with the Fresh Florals Designer Series Paper, just add some colour right over the top of the patterns with the sponge roller. How gorgeous is this? It reminds me of chintz fabric.

Gold Foil Designer Acetate
To bring some gold into this layer, I overlaid it with one of the Gold Foil Designer Acetate designs.

Heat Embossing on Embossing Paste
I used a technique shared by Jay and Barry from Mitosu Crafts here … heat embossing on embossing paste to add a textured gold touch over Tranquil Tide cardstock.

Gold Embossing on Gold Foil Card
And how could you go past some gold embossing on Gold Foil Card. I used the Paisley design stamp from Paisley and Posies stamp set to achieve a swirly, detailed pattern.

Stitching it all together ….
So after creating all my separate elements, I cut them into strips. The Eastern Palace Gold Pattern lends itself to a little bit of fussy cutting, and the Bundle of Love striped paper was perfect for cutting the narrow strips to go between the strips.

I adhered all the strips down onto a 13.5cm x 13.5cm piece of Tranquil Tide cardstock, starting with the gold embossed strip right in the centre and finishing with the Eastern Palace paper at top and bottom. I was able then to slip the Gold patterned acetate just under the peaks from the Eastern Palace fussy cut paper until it lodged in the liquid glue and encapsulate the other edge under the joining Bundle of Love strip. No adhesive show!!
It did look pretty messy at this stage, with strips of paper hanging off the base square everywhere, but once I had trimmed it down, it became this gorgeous sampler of Thai Silk. (Big tip … you will need something stronger than the Paper Trimmer to chop this baby down … I used my guillotine). If you only have a paper trimmer, I would chop each strip to size as you glue them down.

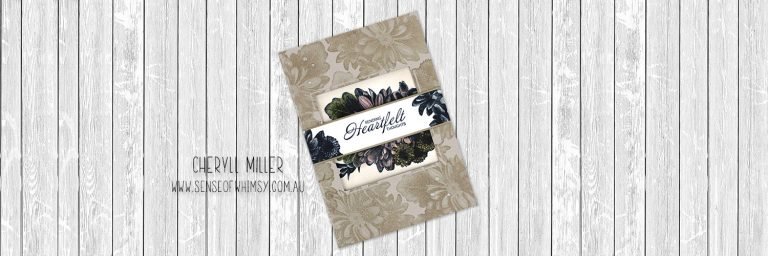
Thankful Grateful Blessed
For the greeting, I gold embossed the Thanks greeting from the Paisleys and Posies stamp set onto a piece of White Vellum paper and then die cut it with one of the Lots of Labels thinlits. I die cut a matching piece from the coloured Fresh Floral Designer Series Paper and then cut them both down at top and bottom to better fit the greeting. To adhere the vellum to the patterned paper, I sponged a light layer of Multi purpose liquid glue over the back of the vellum.
A quick whip around with some Gold Metallic thread to which I attached a Gold Mini Tassel, and then I adhered the whole shebang to the front of a 140cm square folded card (Tranquil Tide).
As always, I decorated the inside of the card while I had all my supplies out.

I had such a lot of fun pottering away at my craft table creating this card. It is a very different card from my first Thailand inspired card, but I was very happy with the end result. What colour would you have used?
I can’t wait to check out what everyone else has created for this blog hop … it is great to see all the different interpretations and you can be sure you will get some great inspiration from the wonderful designers.
Thanks for stopping by today!


Just Gorgeous! Beautiful job with fantastic techniques!!
Thank you so much Crystal! xxx
So beautiful with all the different textures and layers. Thank you for the shout out as well and for all the great tips you have shared in creating this stunning card
Thank YOU Jay for your wonderful inspiration! xx
Absolutely stunning Cheryll.
thanks so much!! xx
So stunning Cheryll! Such a lot of work with all this layers but the end result is definitely worth it!
Thanks Sandra, yes it is a labour of love. It was an enjoyable time coming up with all the gold bits for the layers though. 🙂
I love how you created the Thai silk card… brilliant! And, I hadn’t seen your card for the Top Ten previously… phenomenal scene!
Thanks so much Debi. Always lovely to have a theme to work to. xx
Wow a card full of so many techniques! So creative and it looks amazing. Well done Cheryll on another incredible card. xxx
🙂 Thanks so much Jodie. Do you think we could create this one in 30 minutes in class?? Haha … joking. But we are definitely going to use a couple of these techniques on some projects. xx
Wow, absolutely stunning, what a lot of work you have put into this card! I love how you have created this card, it really does look like fabulous silk, sorry I doubted that you could better your fabulous first entry, you nailed it! 🙂 Thank you so much for sharing. Colouring the foil is fun, I have been laying shapes on and sponging around to give different effects – fun 🙂 love the tranquil tide, it is perfect, wonder how berry burst would look??
Thanks Anne … yes I still have a soft spot for that first card! 🙂 Oh, putting shapes down and colouring the foil patterned paper sounds like a fab idea. Will have to try it. And Berry Burst would be stunning with the gold!! xx
Wow what a great card, I love using gold when I can especially gold embossing
Thank you Colleen! Yes embossing is such fun. I have just been looking at your wonderful embossed cards on the Sense of Whimsy VIP page. 🙂 xx
Love all the techniques you have incorporated into layers here Cheryll. Your card looks amazing!
Thanks so much Kim. You just can’t top your totally personalised “from the heart” card. As always, great hopping with you! 🙂
Ohhh wow such a beautiful card Cheryll Gold is such a favourite it just add so much class xx
Thanks Debbie. Yes I agree about the gold. I thought adding gold to all the layers might be a little bit too much, but it all seemed to come together. xx
Love love love your card! Did you hear my Uhhhhhs and Ahhhhs ? This is super gorgeous. I love everything on this card.
Thank you Satomi. It was a bit of a mess on my craft desk (not to mention my hands) after playing around with all those techniques, but such a good feeling when a project comes together. I also loved your project! 🙂 xx
Lovely card and wow on the step by step detail! So easy to CASE when you give that much information!
Thank you Stesha! You are very welcome … great hopping with you! xx
Absolutely beautiful Cheryl. Thank you for the great tips too.
Thank you Rae! Loved you beautiful card too. xxx